Content
If you have to create a lot of similar jobs for signature, it makes sense to work with templates. This saves precious time. This article explains how to create a template.
Templates are only displayed in the process in which they were created and can now be used to create further jobs. The following data is stored in a template:
-
Iterations (including signature quality and recipient)
-
Signature position (position and size of the placeholder)
-
Job description
-
Category
-
Expiration date
Please note: The template can be applied to any document. Therefore, the desired document must be uploaded before applying the template. This is because the document itself is not saved when a template is created.
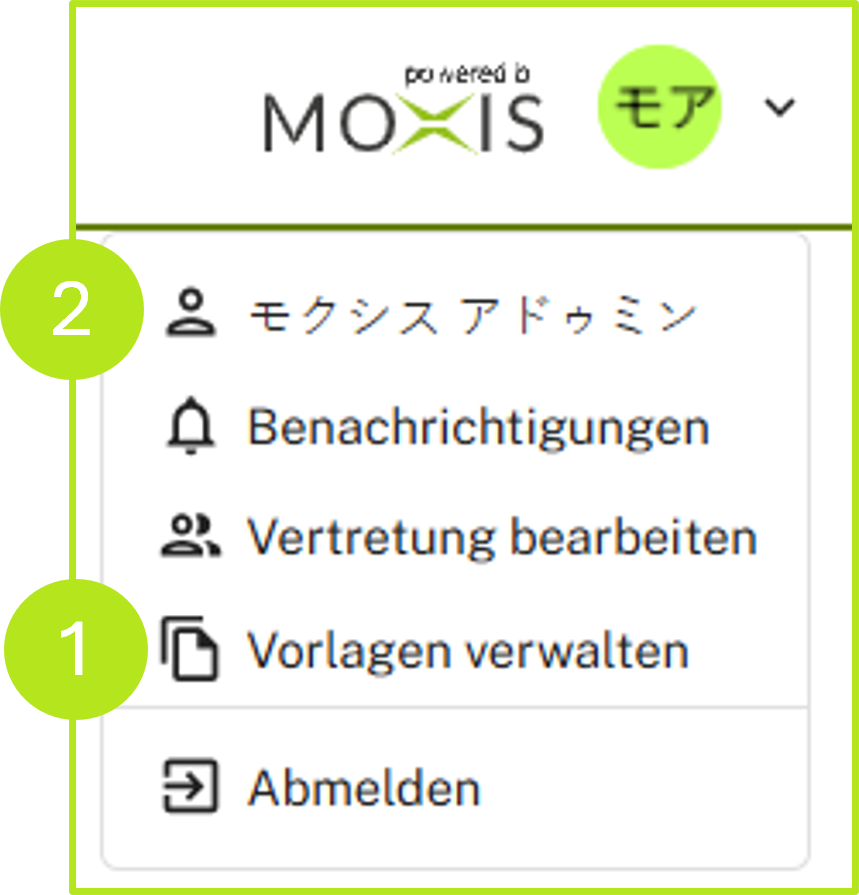
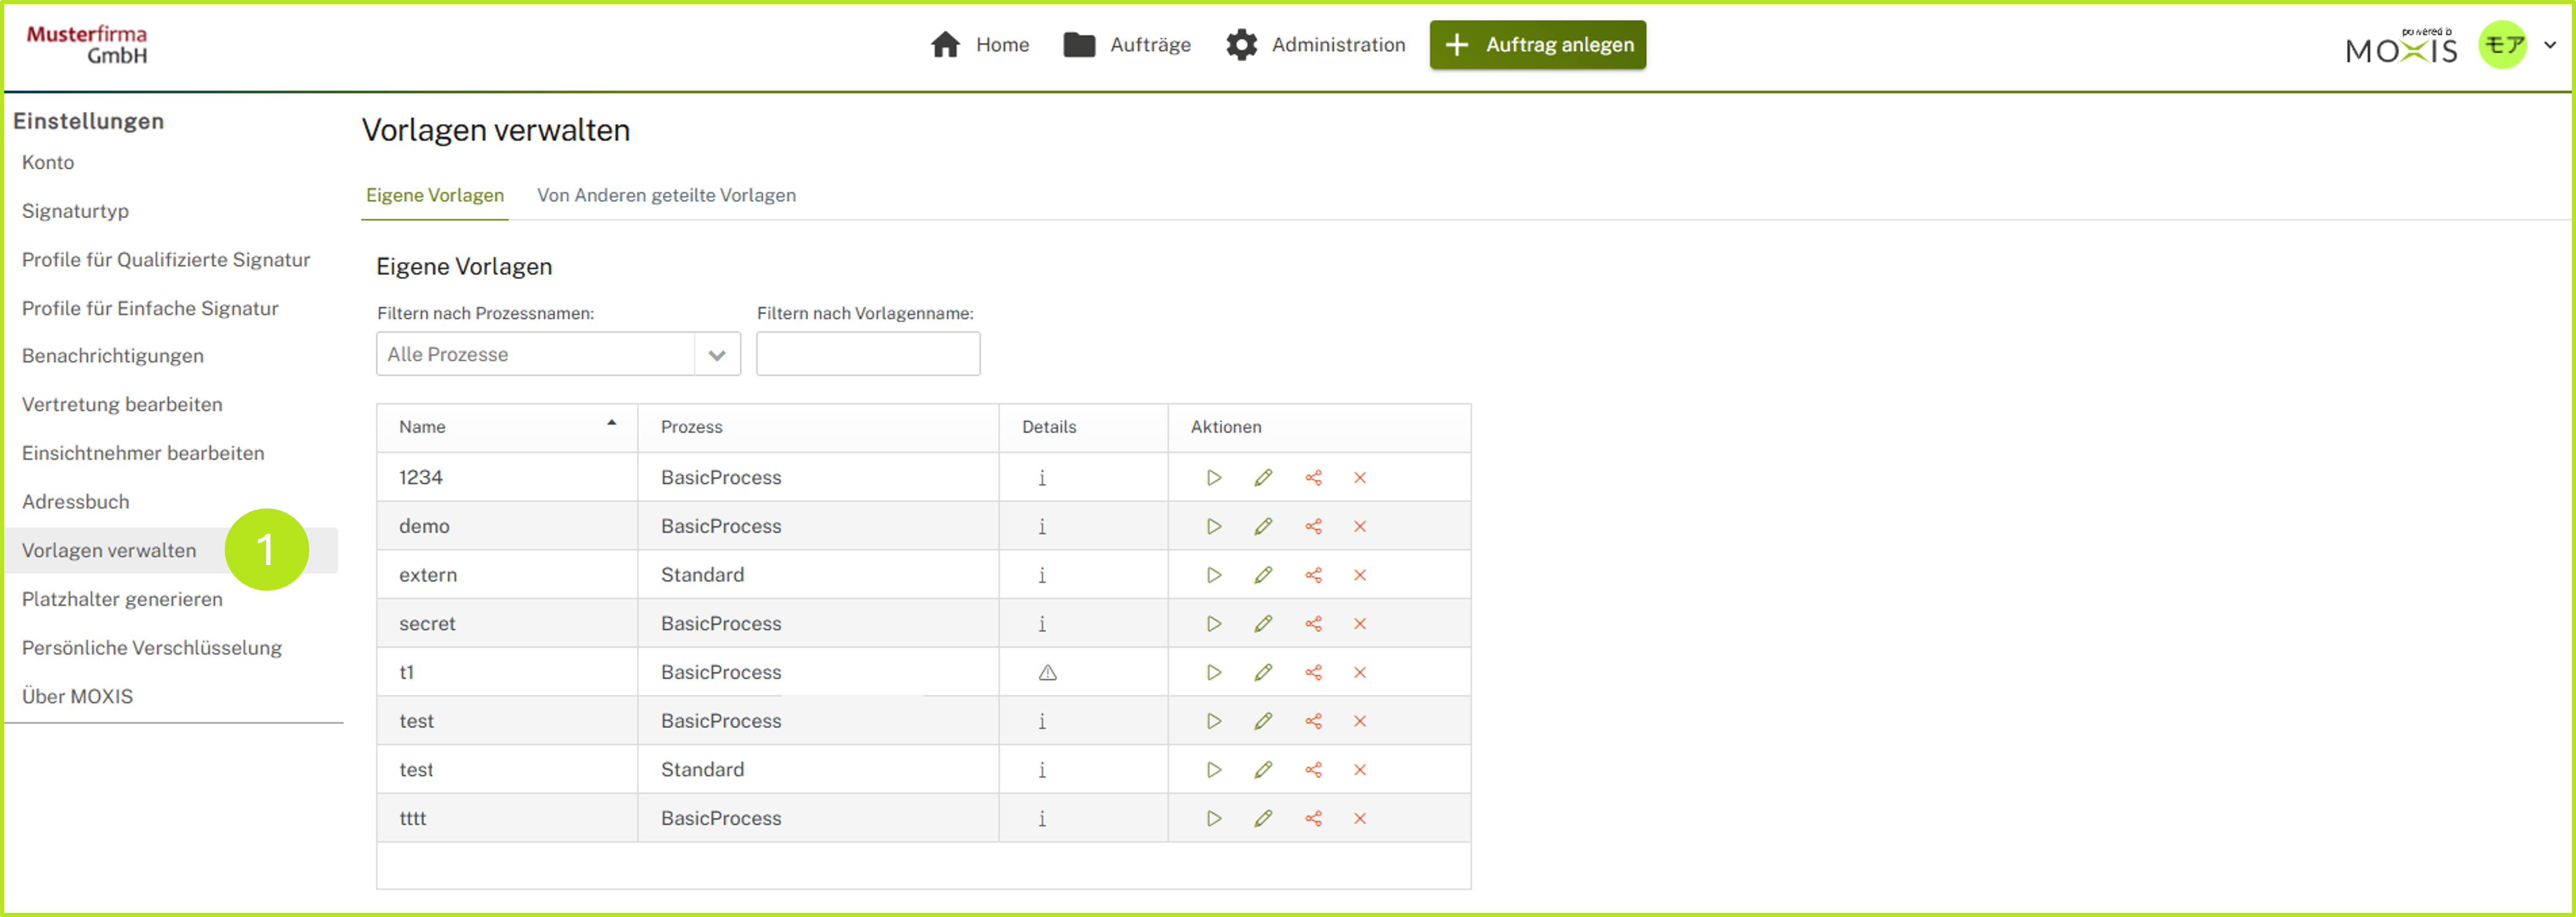
To manage templates, open the user settings in MOXIS and then click on the Manage templates menu item (see figure 1 [1]). Alternatively, you can open the user settings with a single click (see figure 1 [2]) and then click on Manage templates (see figure 2 [1]).
There are two ways to create templates: You can create them during order creation or generate a template from an existing job.
2. Step-by-step instructions for creating a template
2.1 Step 1: Creating a job and a template
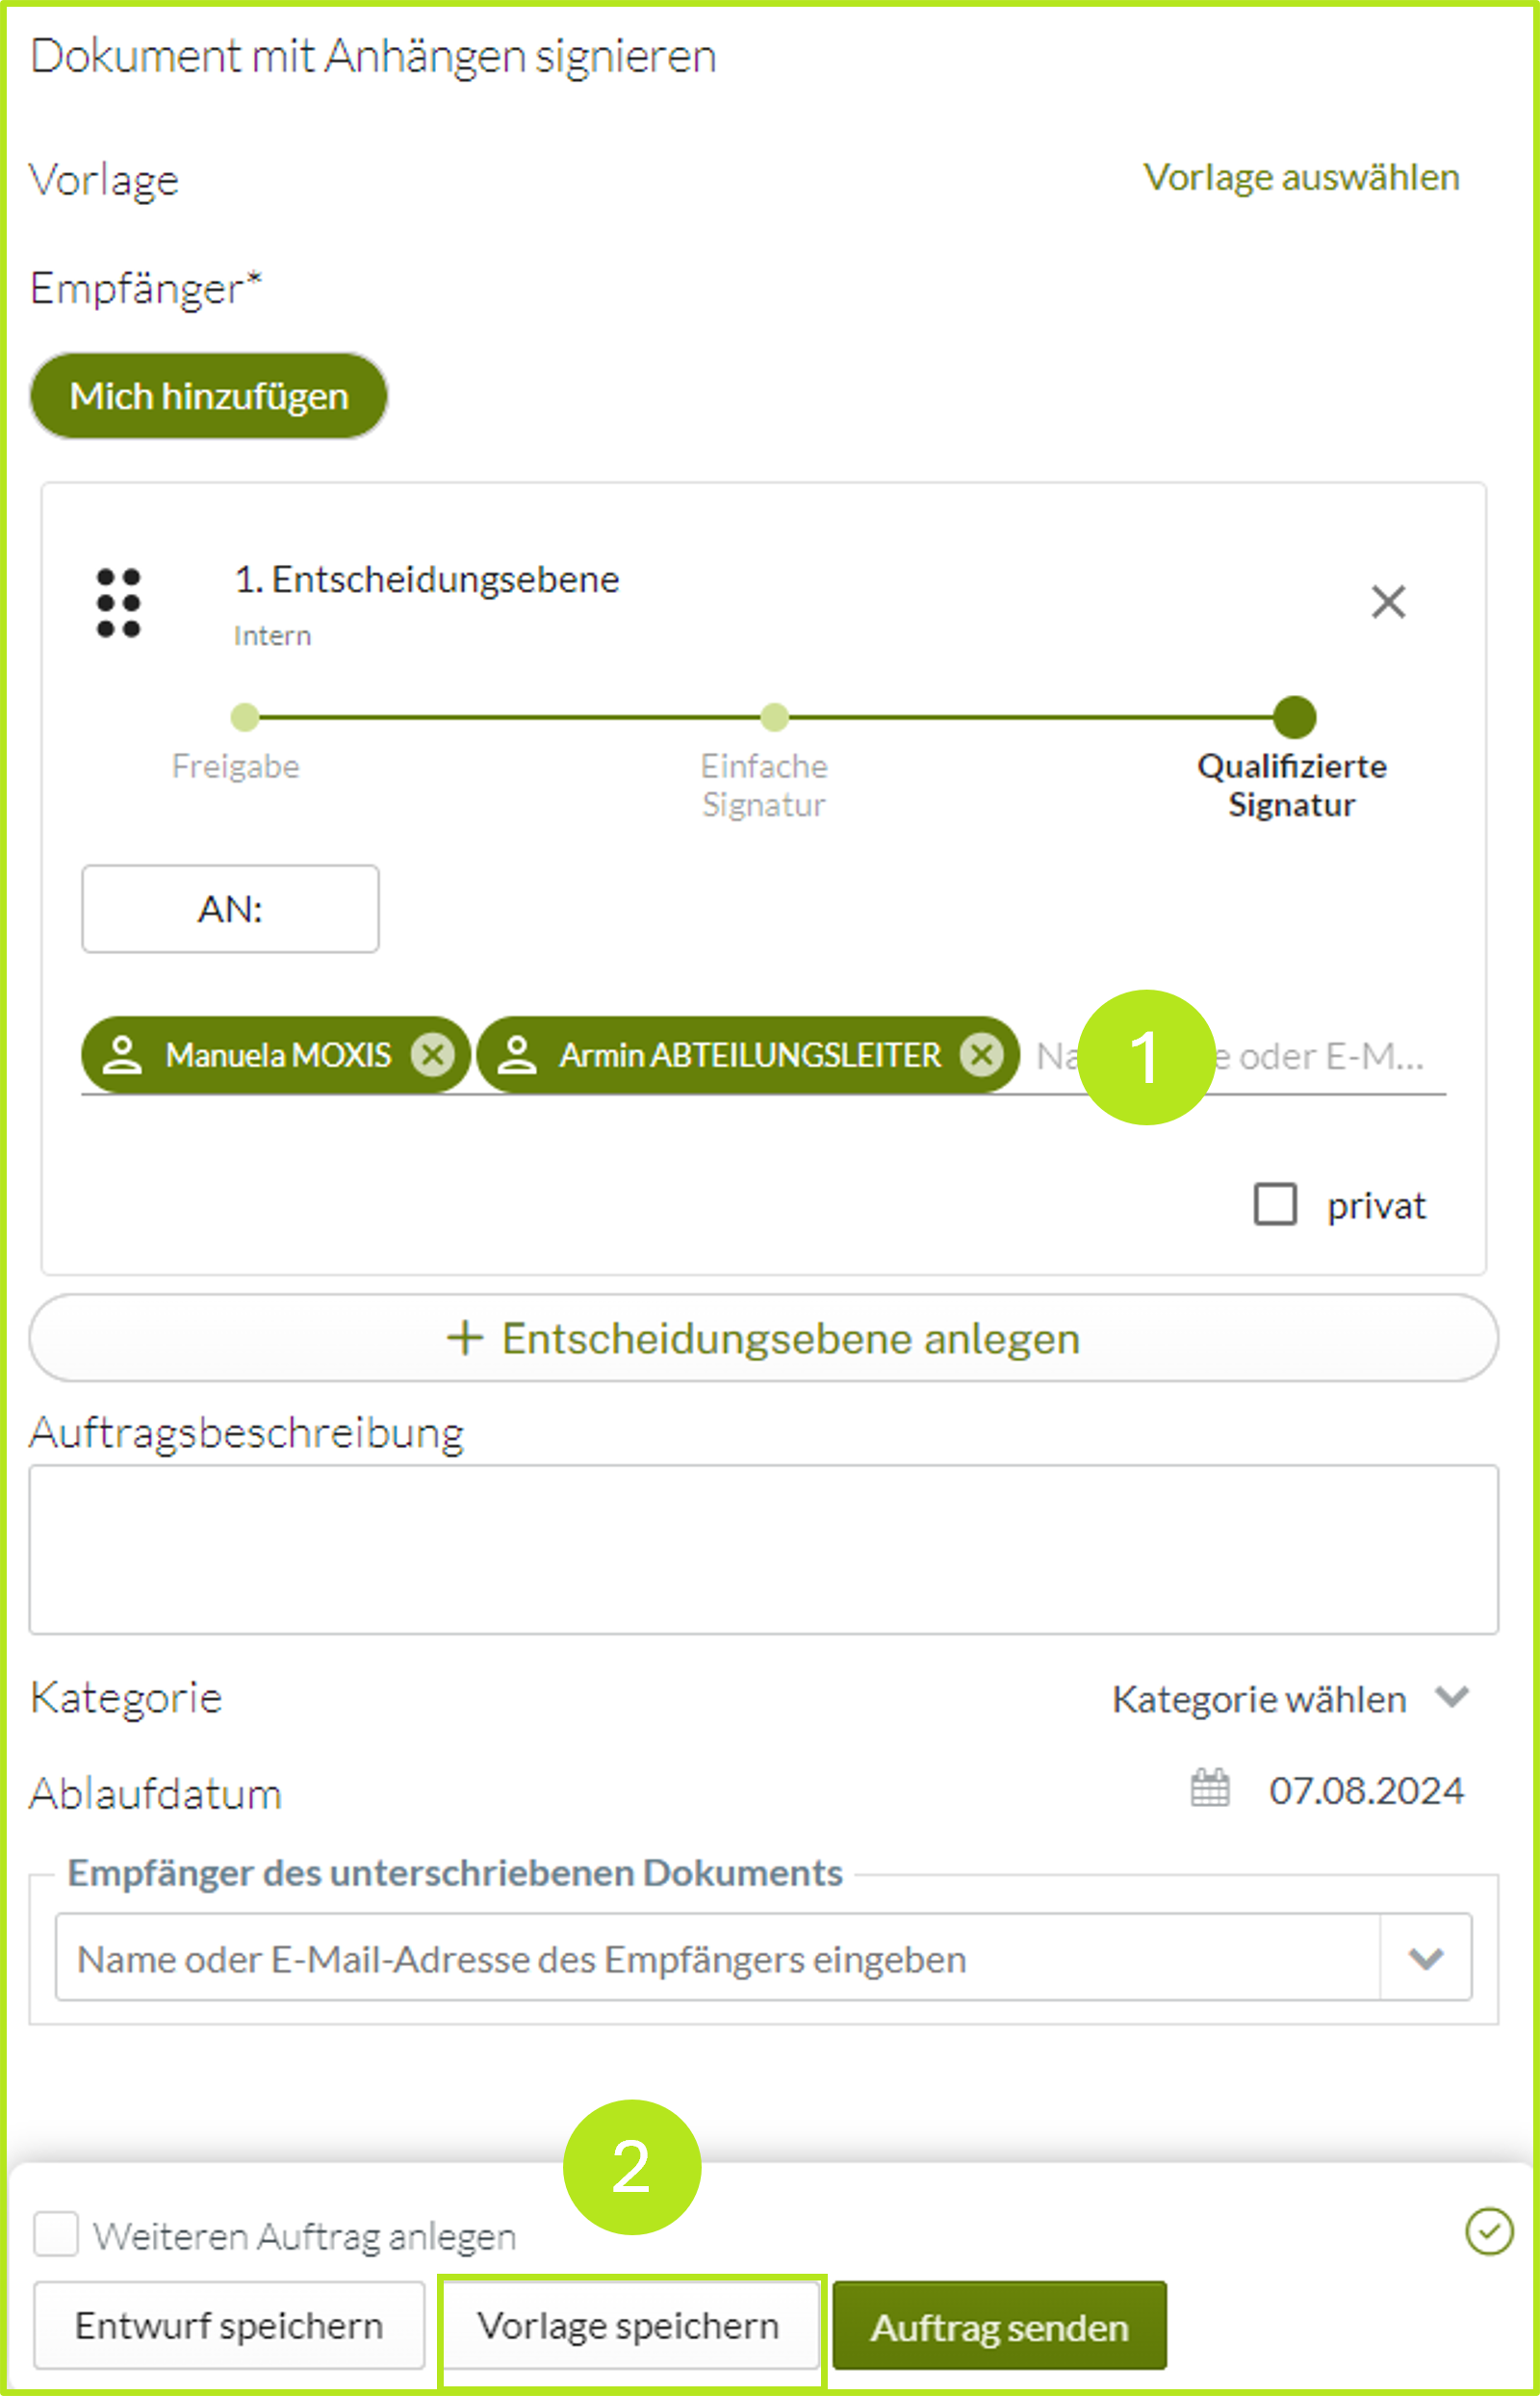
To create a template when creating a job, start by creating a job as described here. To create the template, simply fill in the fields that you need for the template (see figure 3 [1]). Not all fields need to be filled in. Then click on the [Save template]-button (see figure 3 [2]).
2.2 Step 2: Saving a template
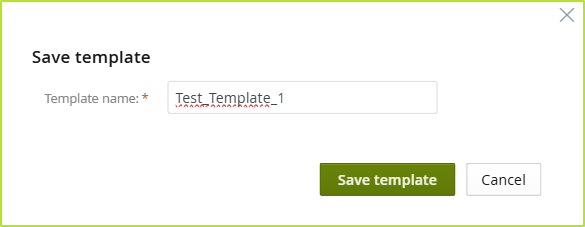
In the following dialogue box, give the template a name and then click on the [Save template]-button (see figure 4).
2.3 Step 3: Saving a template
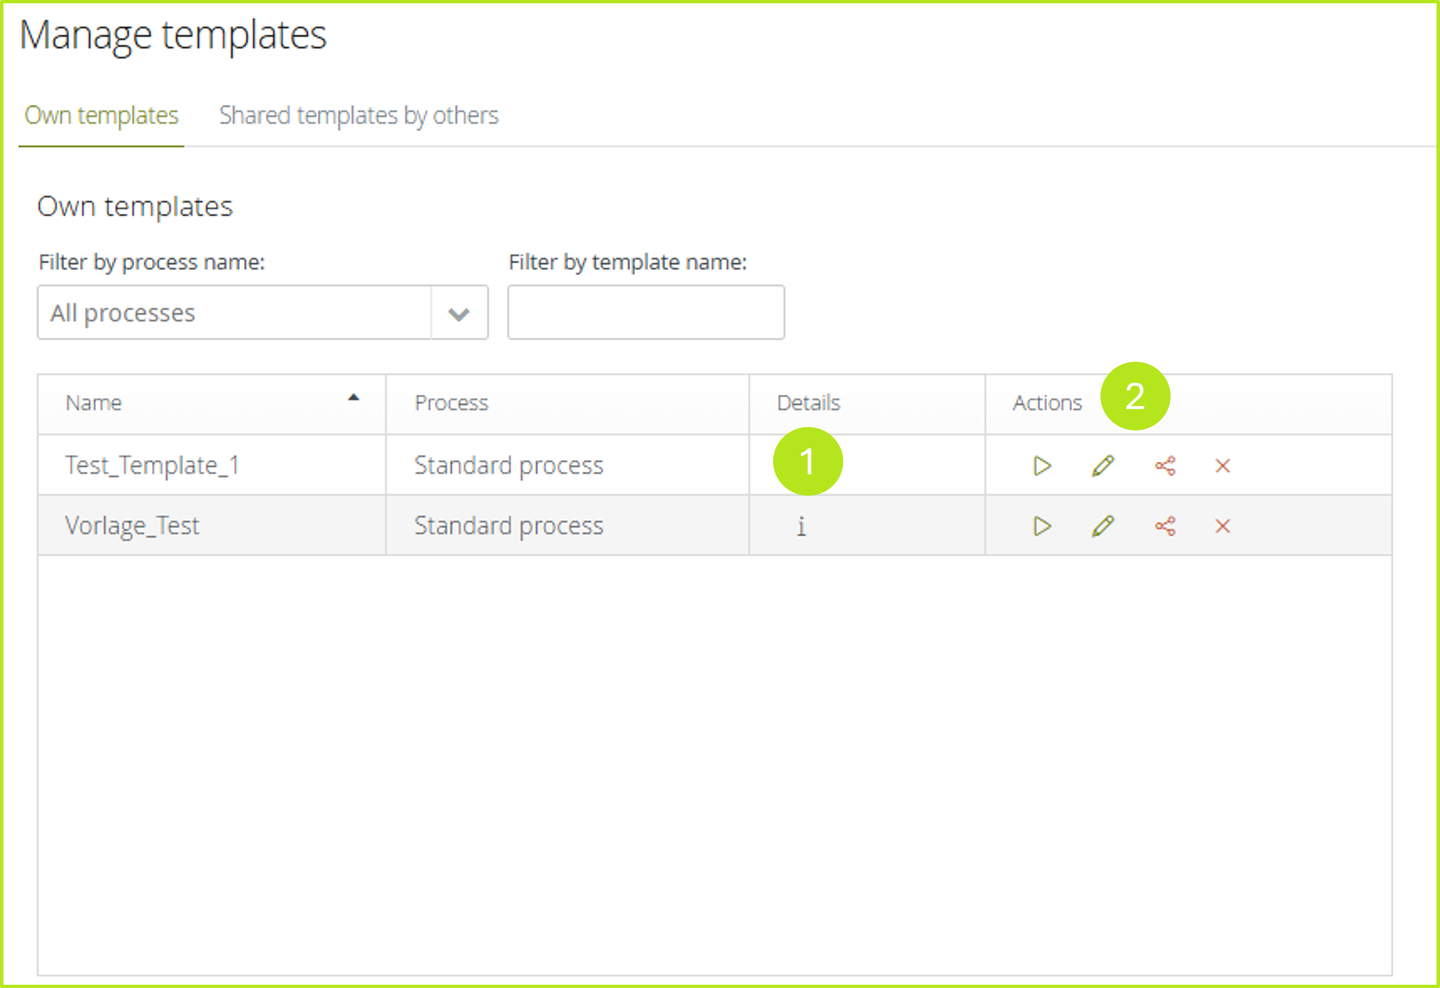
The template is now saved in the Template Management in the Settings and can be accessed at any time as shown in figures 1 and 2, or adjusted by clicking on the edit icons (see figure 5).
Here you can also view details by clicking on the i in the ‘Details’ column (see figure 5 [1]). Or you can edit any template by using the icons in the ‘Actions’ column (see figure 5 [2]). To do this, simply click on the respective icon.
From left to right, you have the following editing options:

Apply template

Edit template

Share template

Delete template
2. Create templates from an existing job
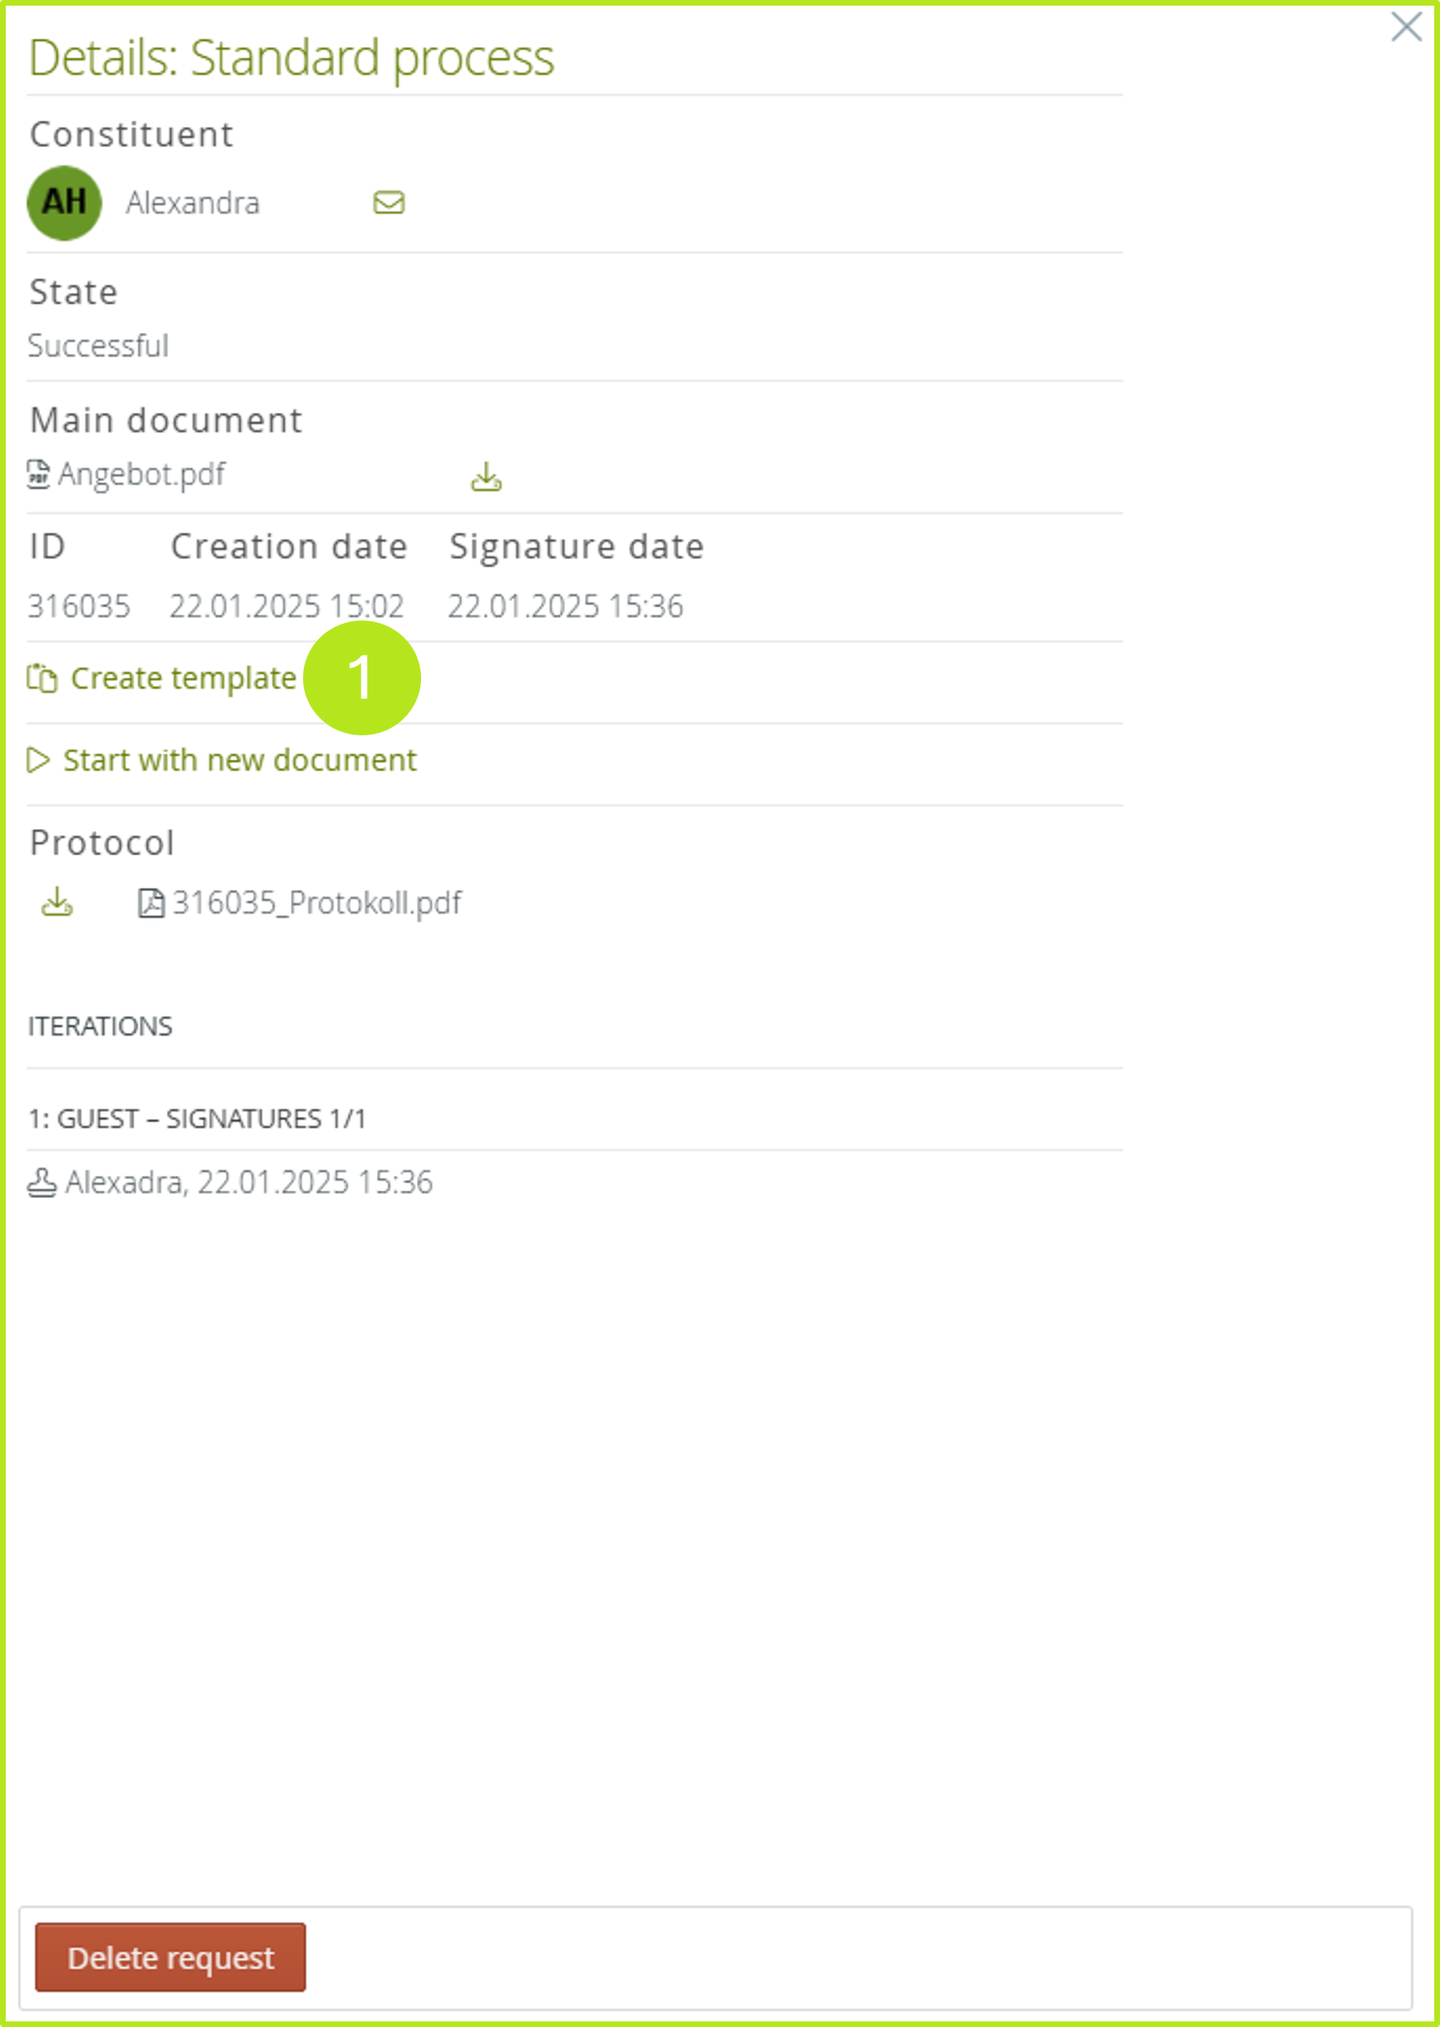
To convert an existing job into a template, simply open the job details view and click on Create template (see figure 6 [1]). You will then be prompted to name and save the template, as described in the previous chapter.