Content
You can sign jobs, but you also have the right to refuse them. If you refuse a job after reviewing it, please follow the instructions in this article.
1. Rejecting documents
It is very easy to reject a document. Please access the job overview via the Jobs menu item. You can reject a job in the detail view of a job by clicking on the Deny option (see figure 1 [1]).

1.1. Entering a reason for refusal (refusal comment)
Depending on the process configuration by the administrator, the entry of a reason for refusal is optional or required. If it is required, there are two ways to do it:
-
Entering a reason for refusal directly in the field provided.
-
Positioning one or more reasons for refusal in a document.
1.1.1. Entering the reason for refusal in the field provided
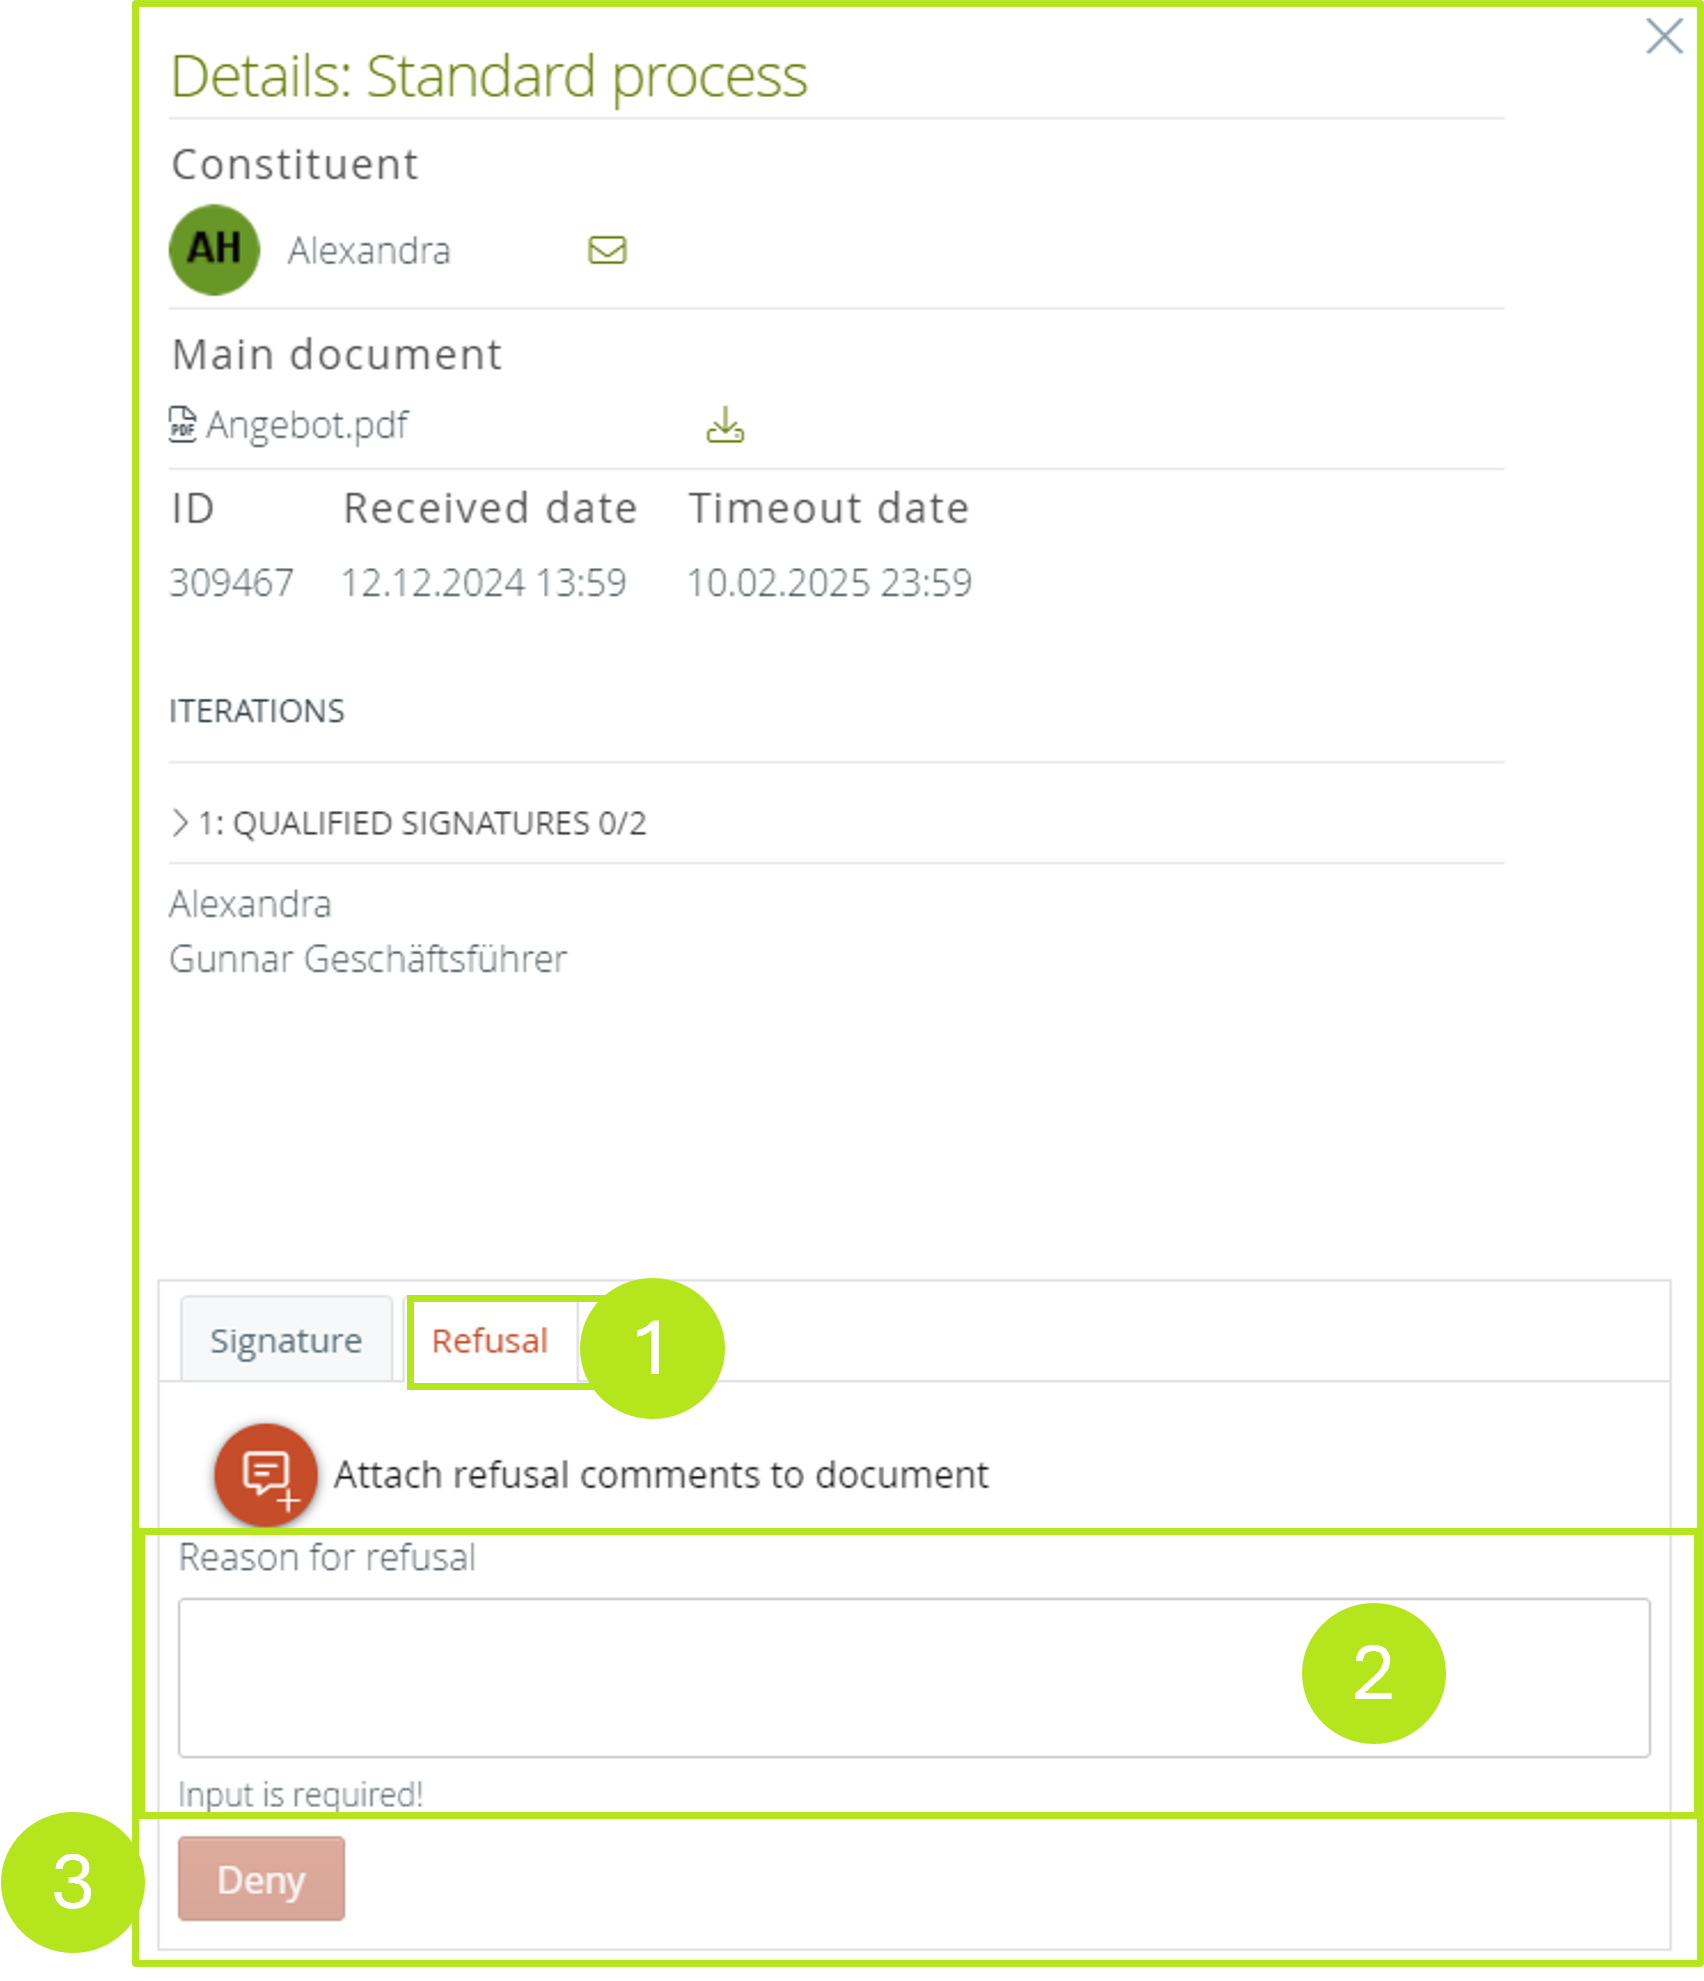
To enter the reason for refusal in the field provided, please open the Refusal-tab (see figure 2 [1]) in the detail view of the order. Then enter a reason for your refusal in the refusal reason field (see figure 2 [2]). Please note: The job cannot be completed if you do not specify a reason. As soon as you have entered a reason, you can reject the job by clicking on the [Refusal]-button (see figure 2 [3]).
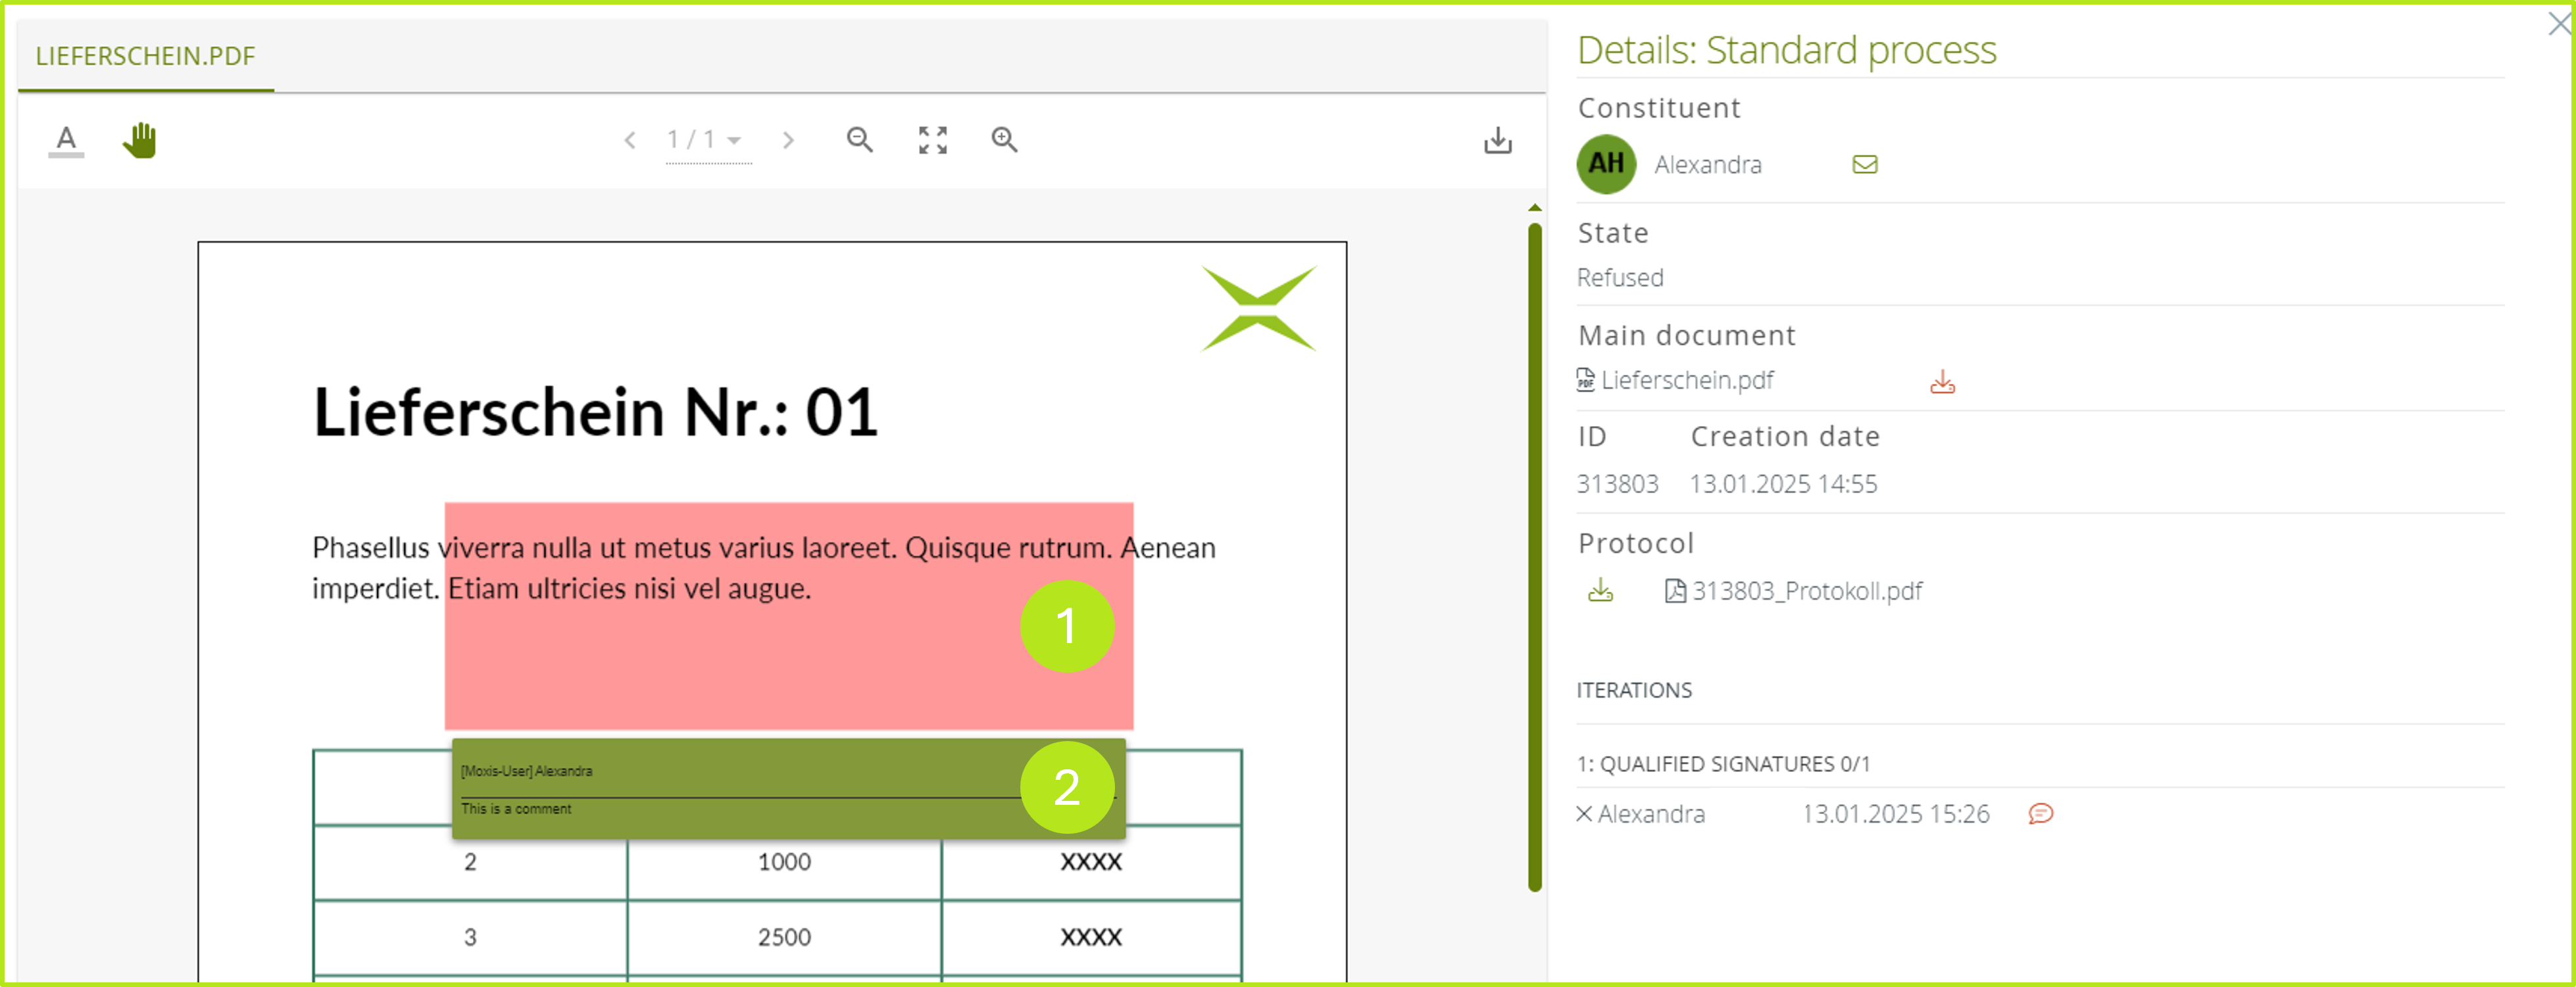
The job is finally given the status denied (see figure 3 [1]). It also appears in the job overview under closed, received orders and is marked in red. You can also find out the reason for refusal by clicking on the red bubble (see figure 3 [2]) under the name of the signatory.

1.1.2. Step-by-step guide: positioning multiple reasons for rejection (rejection comments)
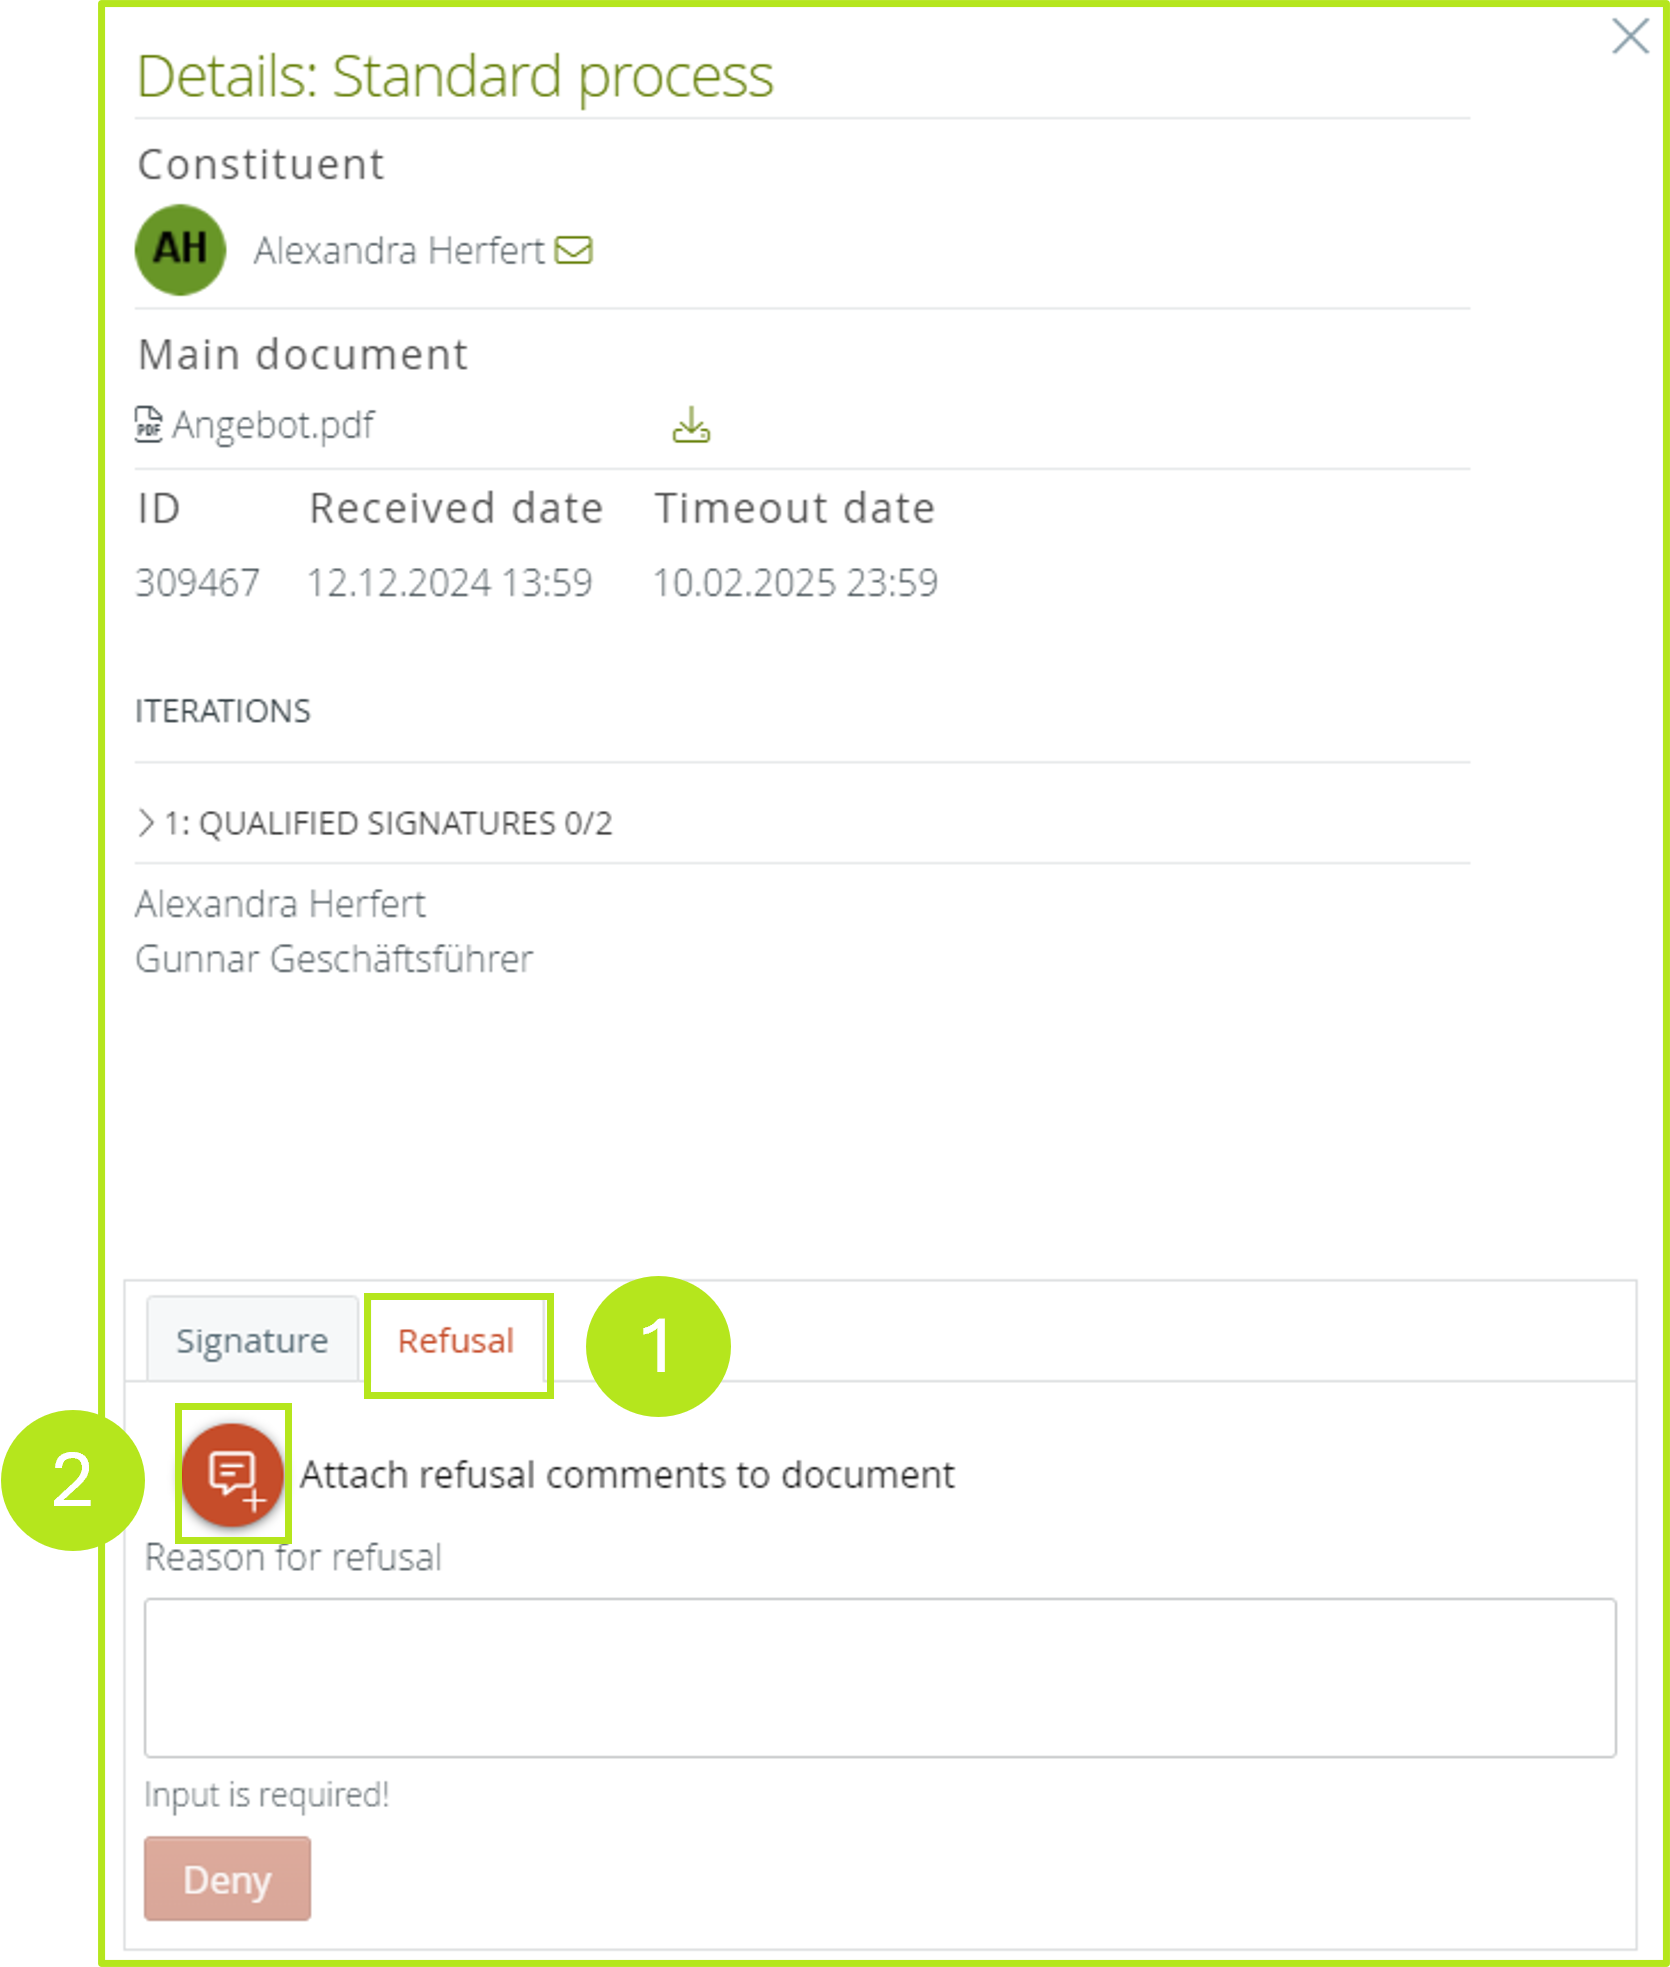
Step 1: To insert multiple reasons for refusal into a document, please open the refusal tab (see figure 4 [1]) in the detail view of the job. Then click on the red comment symbol (see figure 4 [2]).
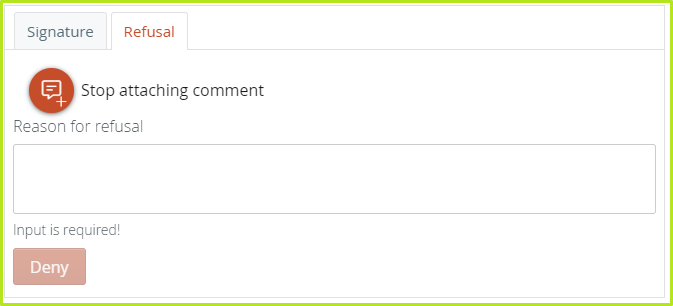
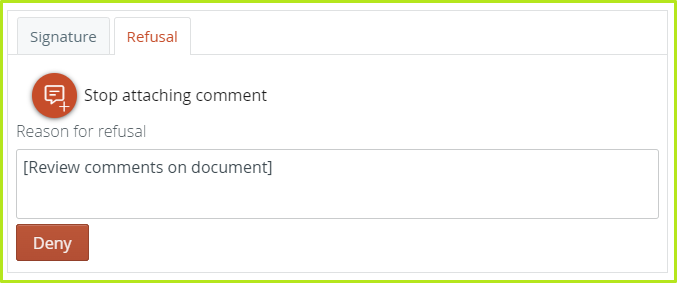
Step 1a: The text next to the red comment icon changes to Stop attaching comment (see Figure 5). (Actually, you just have to click the icon a second time if you want to stop adding comments.)
Step 2: To add a comment, navigate to the desired location in the document and highlight the place you would like to comment on. A dialogue box will open (see figure 6). Please note: You can change the colour of the comment field border using the coloured tiles. To cancel the process, please click the [Abort]-button.
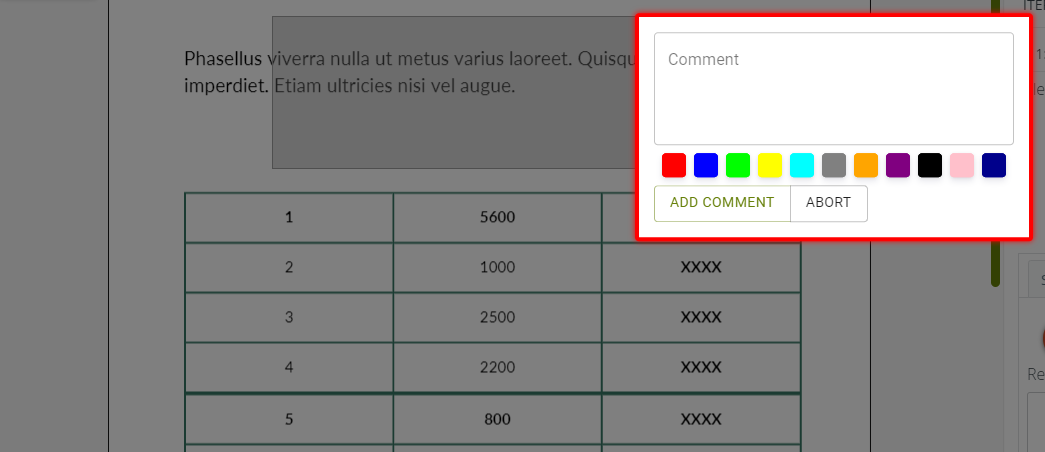
Step 3: Enter your comment and then click on the [Add Comment]-button. A point in the document has now been marked. You can now use the various buttons provided (see figure 7) to edit or delete this comment, or to add another comment at the same location.

Step 4: The Reason for refusal field has been automatically filled with the text [Review comments on document] (see figure 8 [1]). You are free to adjust this text. However, it must be filled in, as MOXIS checks the field. To complete the process, please click on the [Deny]-button (see Figure 8 [2]).
1.2. Viewing refusal reasons (refusal comments)
To view a refusal comment, simply navigate to the colour-coded locations in the document text in the detail view (see figure 9 [1]). These correspond to the colour assigned to the comment. The position itself is where the comment was placed. If you move the mouse over it, you will see both the user who placed the comment and the refusal comment itself (see figure 9 [2]).