
Content
Sometimes an incorrect phone number may be entered for an external signer. In this case, the text message needed for the TAN will not arrive due to the incorrect number. This step-by-step instruction provides a quick solution that prevents you from having to create the job again as the constituent.
Step-by-step guide: How to exchange phone numbers of external signers
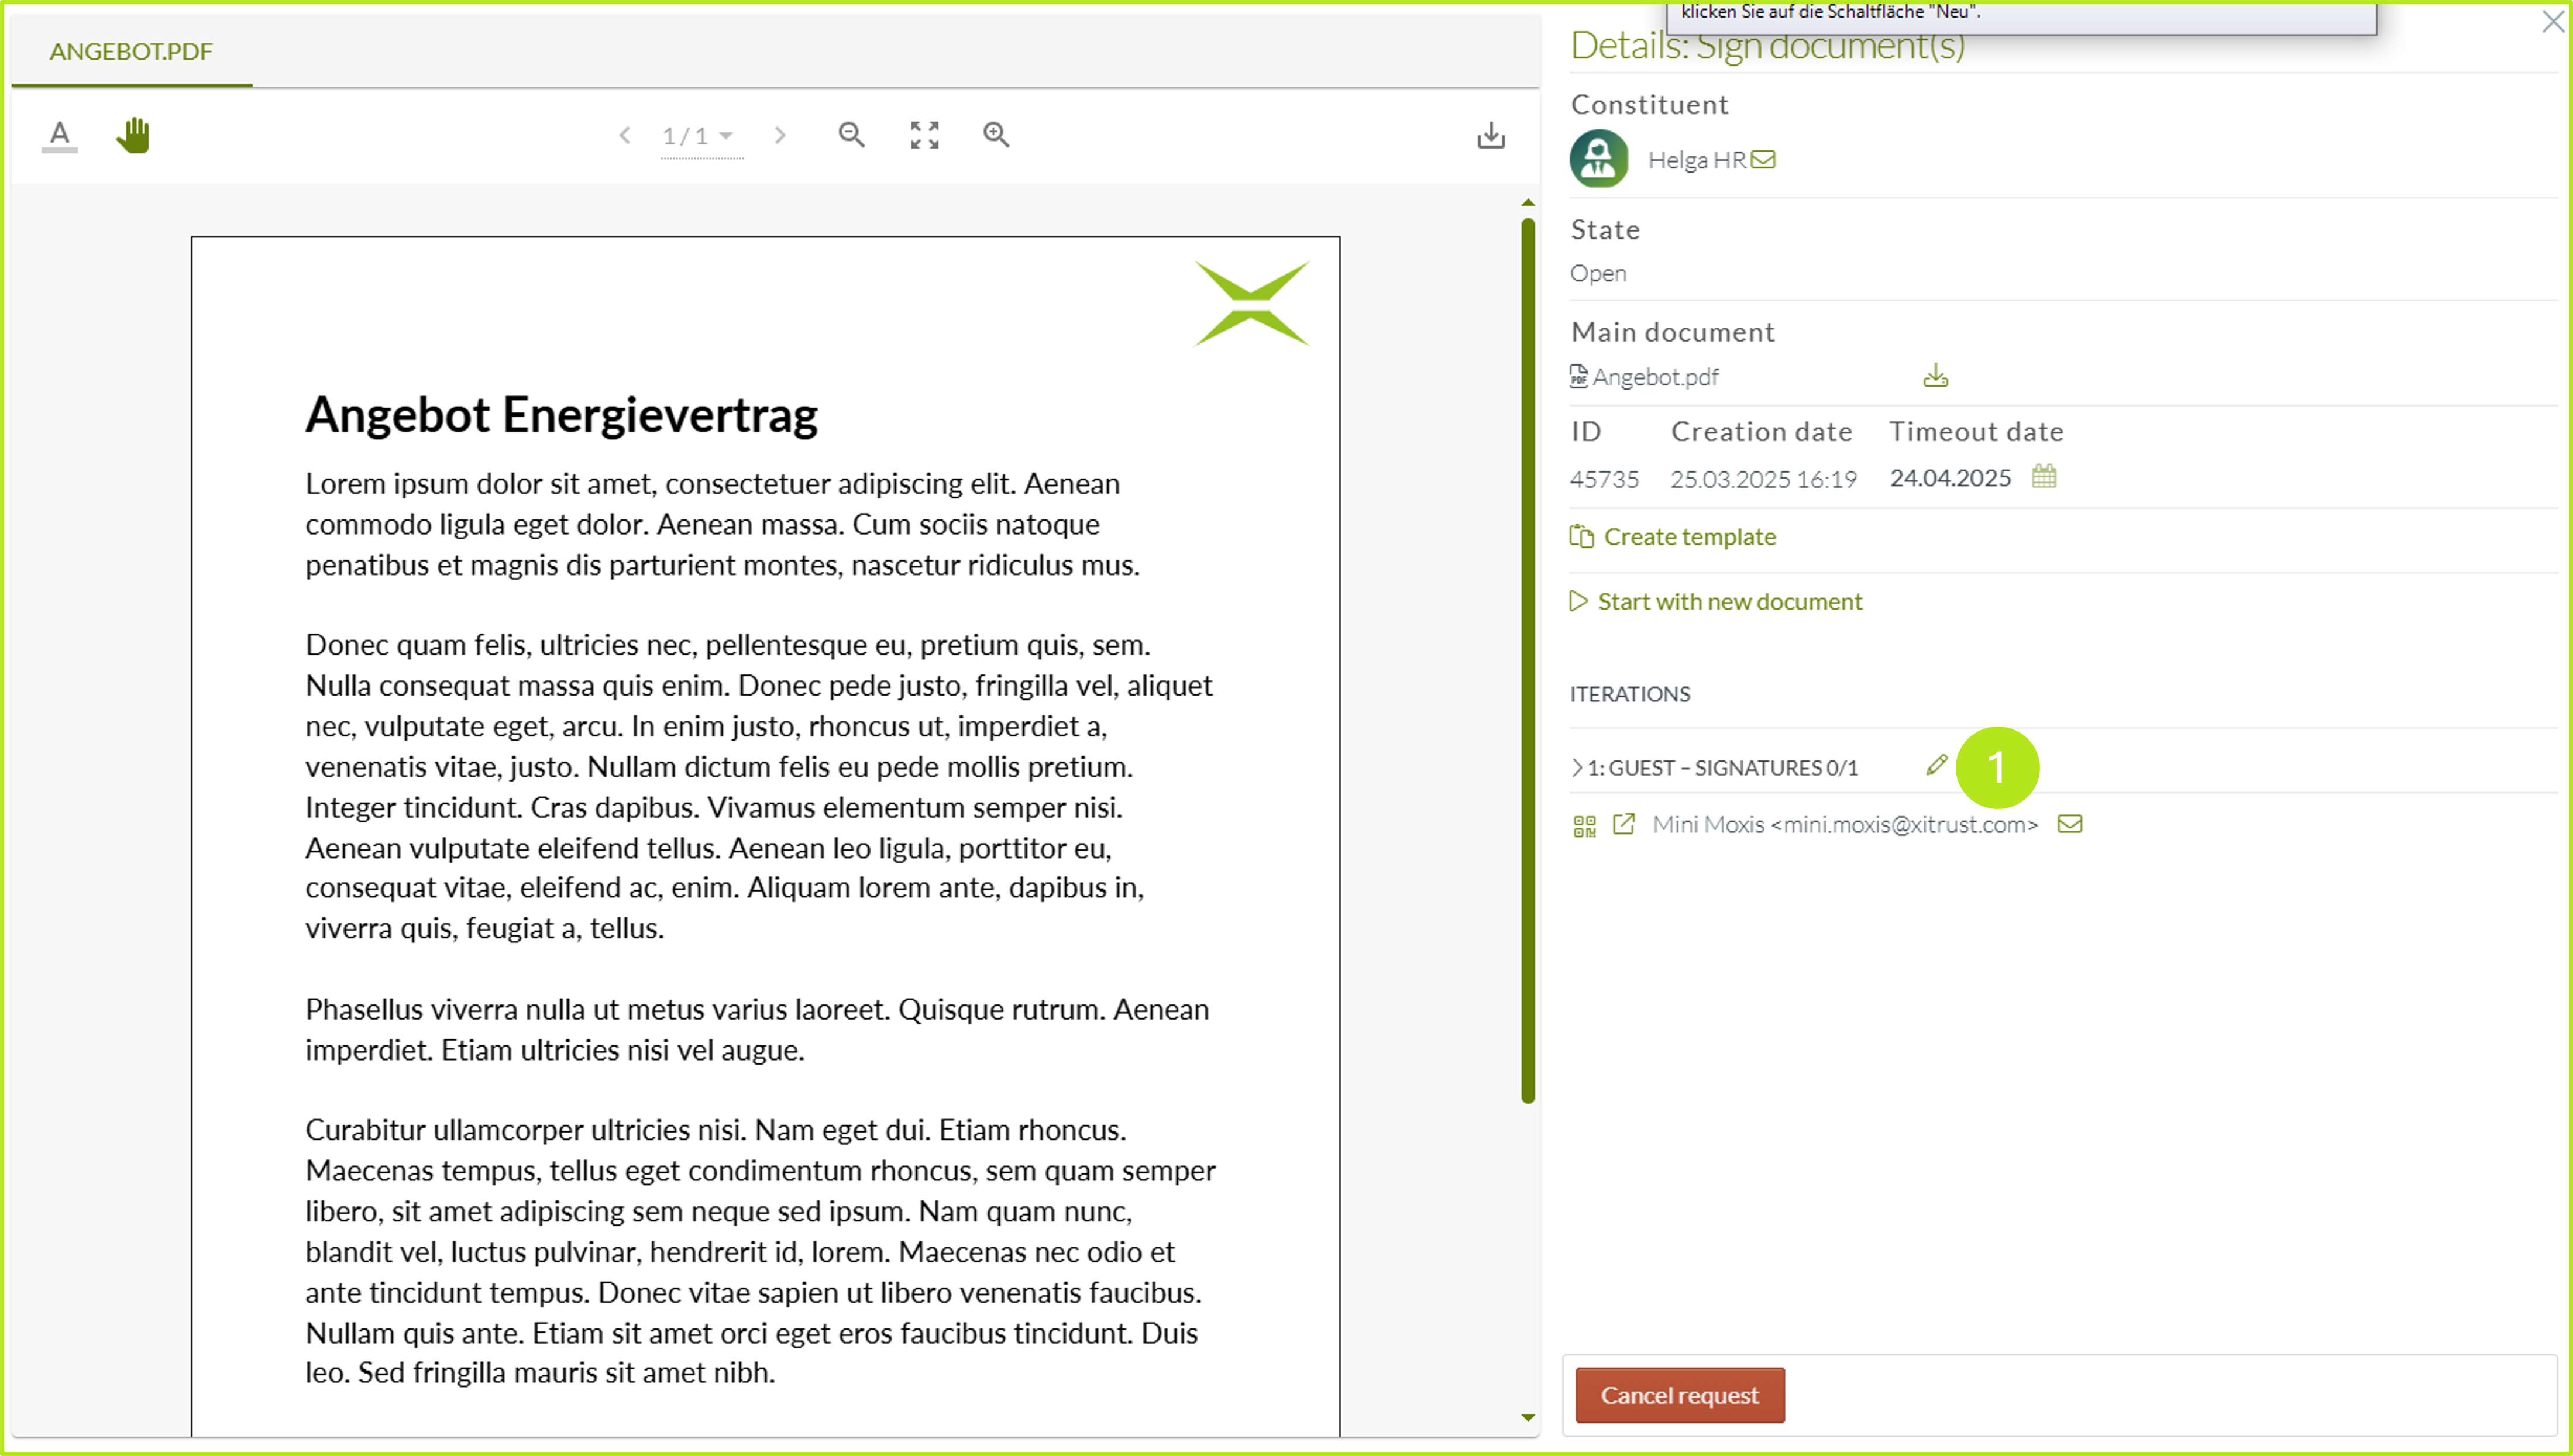
Step 1: If an external contact has provided an incorrect phone number, please navigate to the detail view of the relevant job and click on the Edit-icon (see figure 1 [1]).
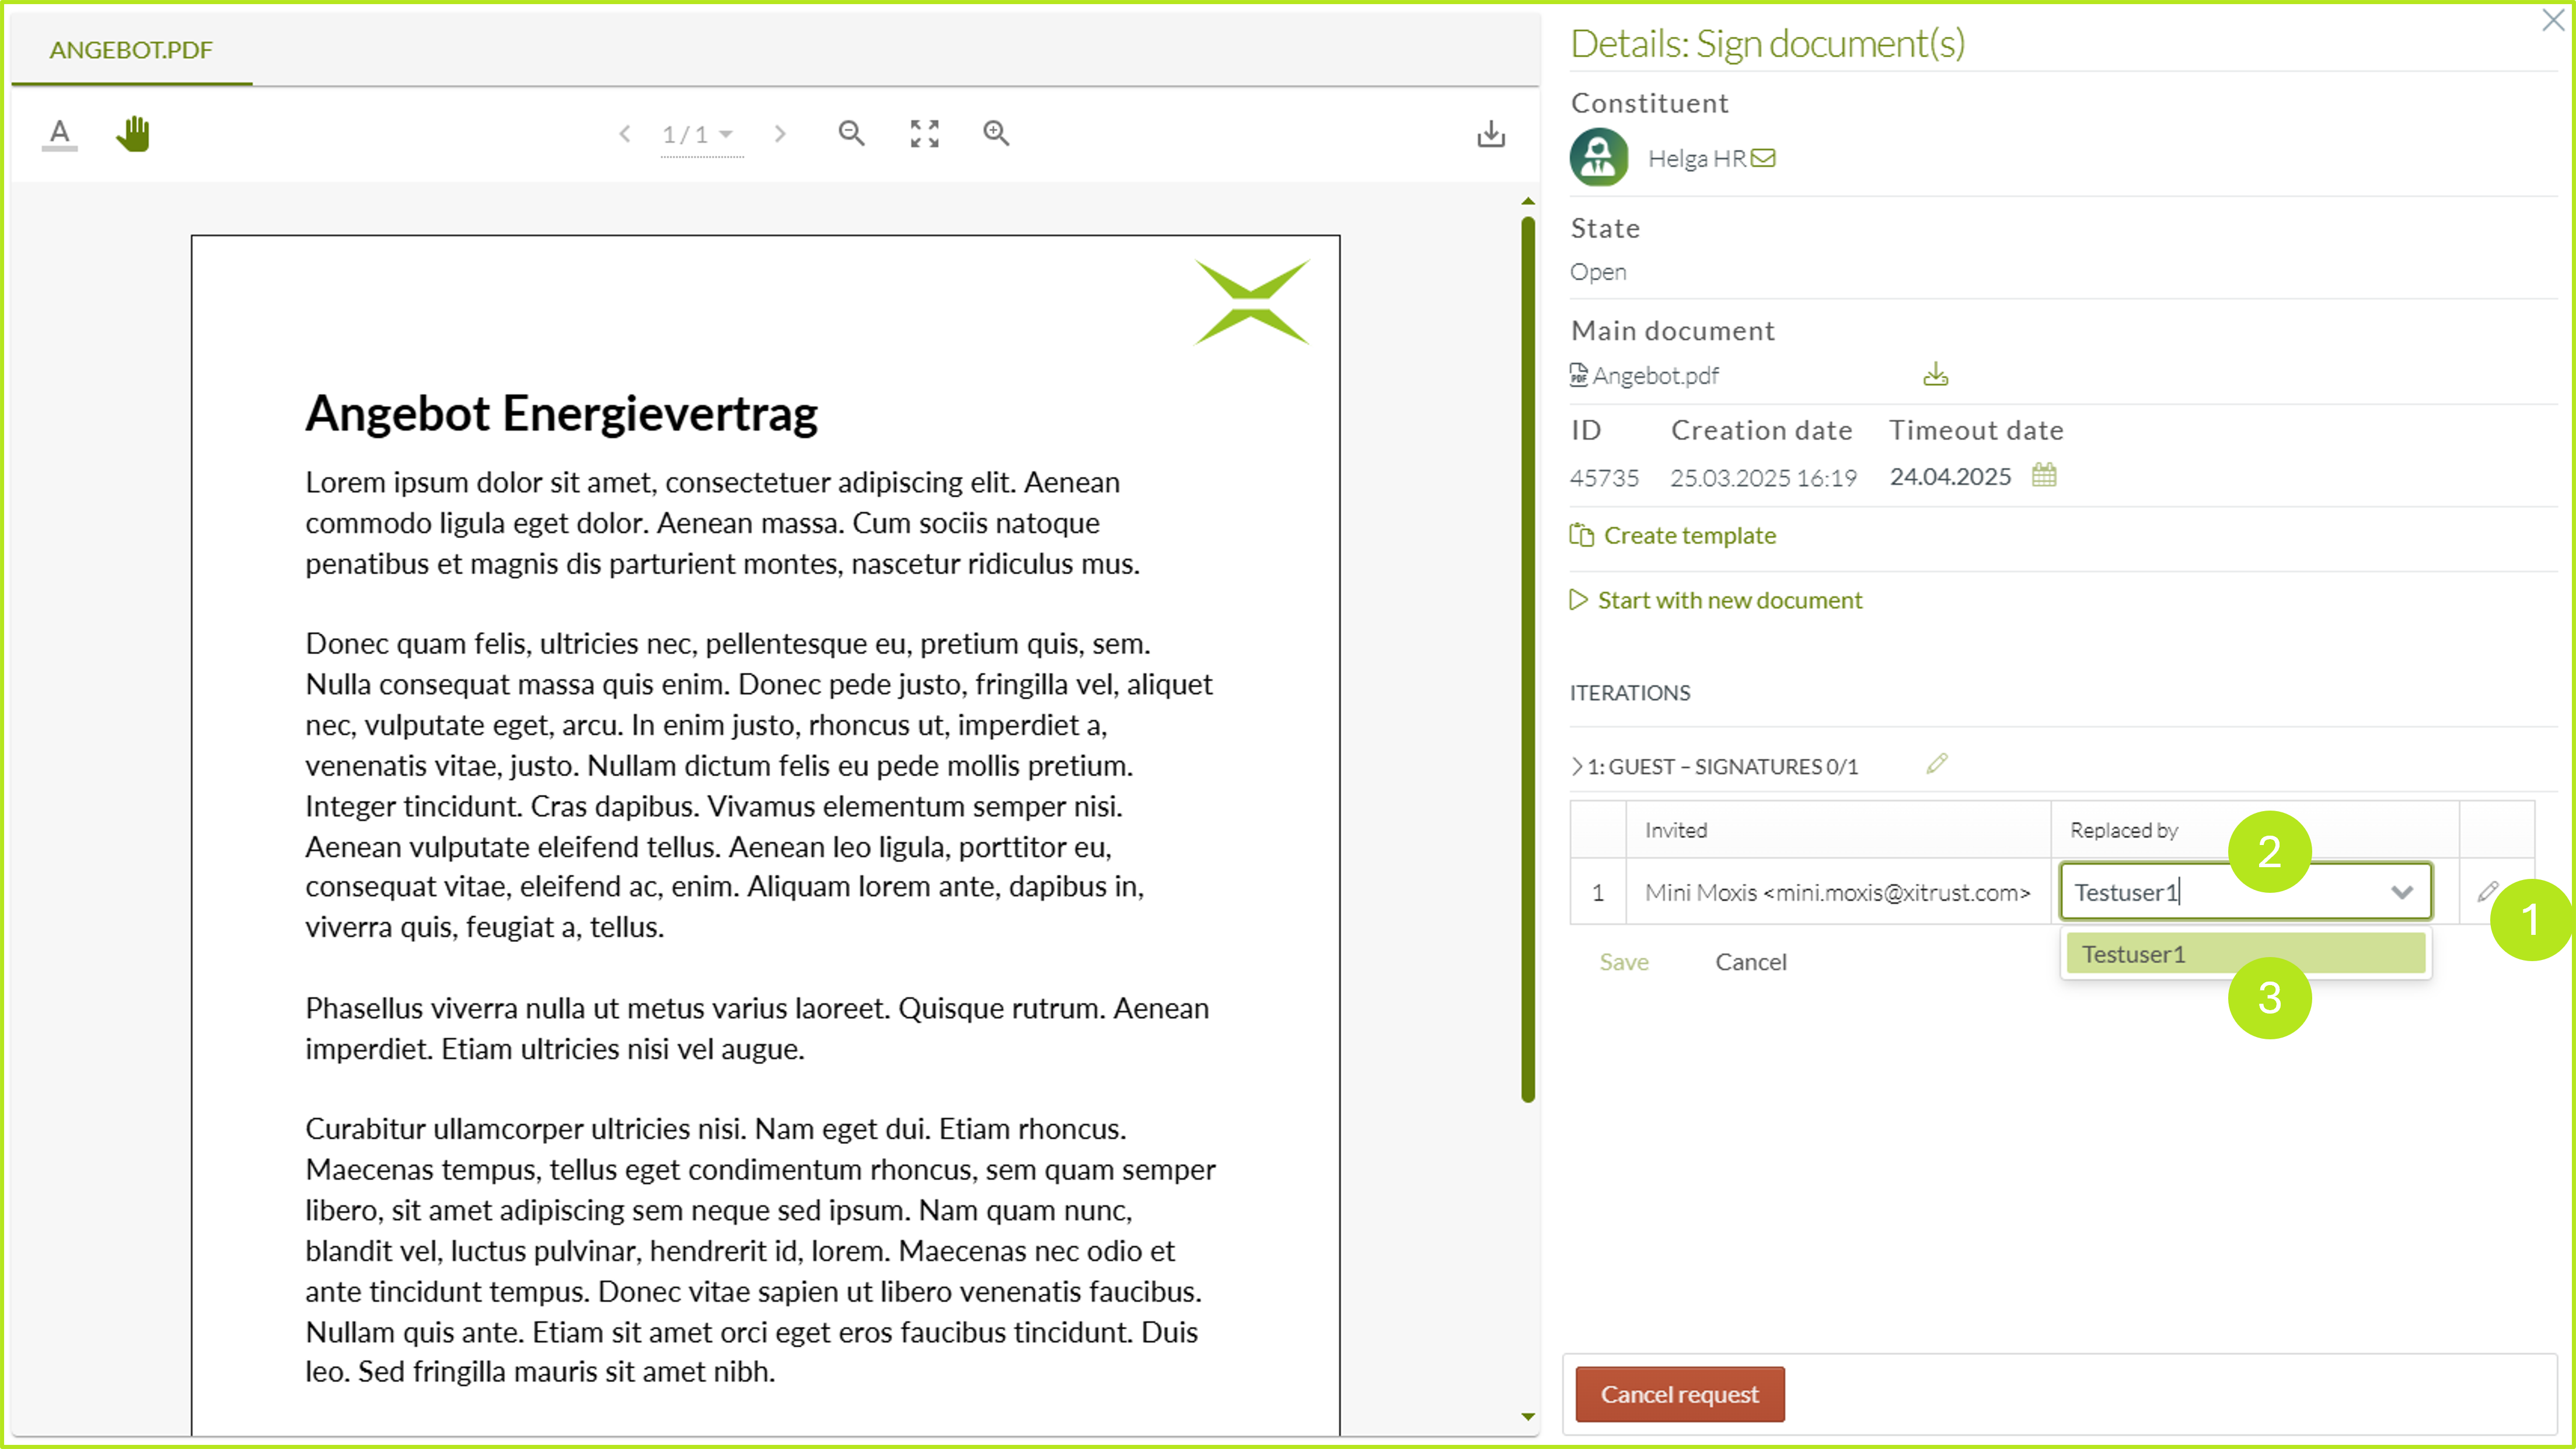
Step 2: In the interface that opens, please replace the assigned contact with a test account. To do this, please click on the edit icon in the overview (see figure 2 [1]) and enter any name for your test user (see figure 2 [2]; we have decided on ‘Testuser1’ for this example). Please note: It is important that the user is not yet created in MOXIS. You can delete it afterwards again.
Hereafter, please click on the green entry that MOXIS suggests for the user you have entered (see figure 2 [3]).
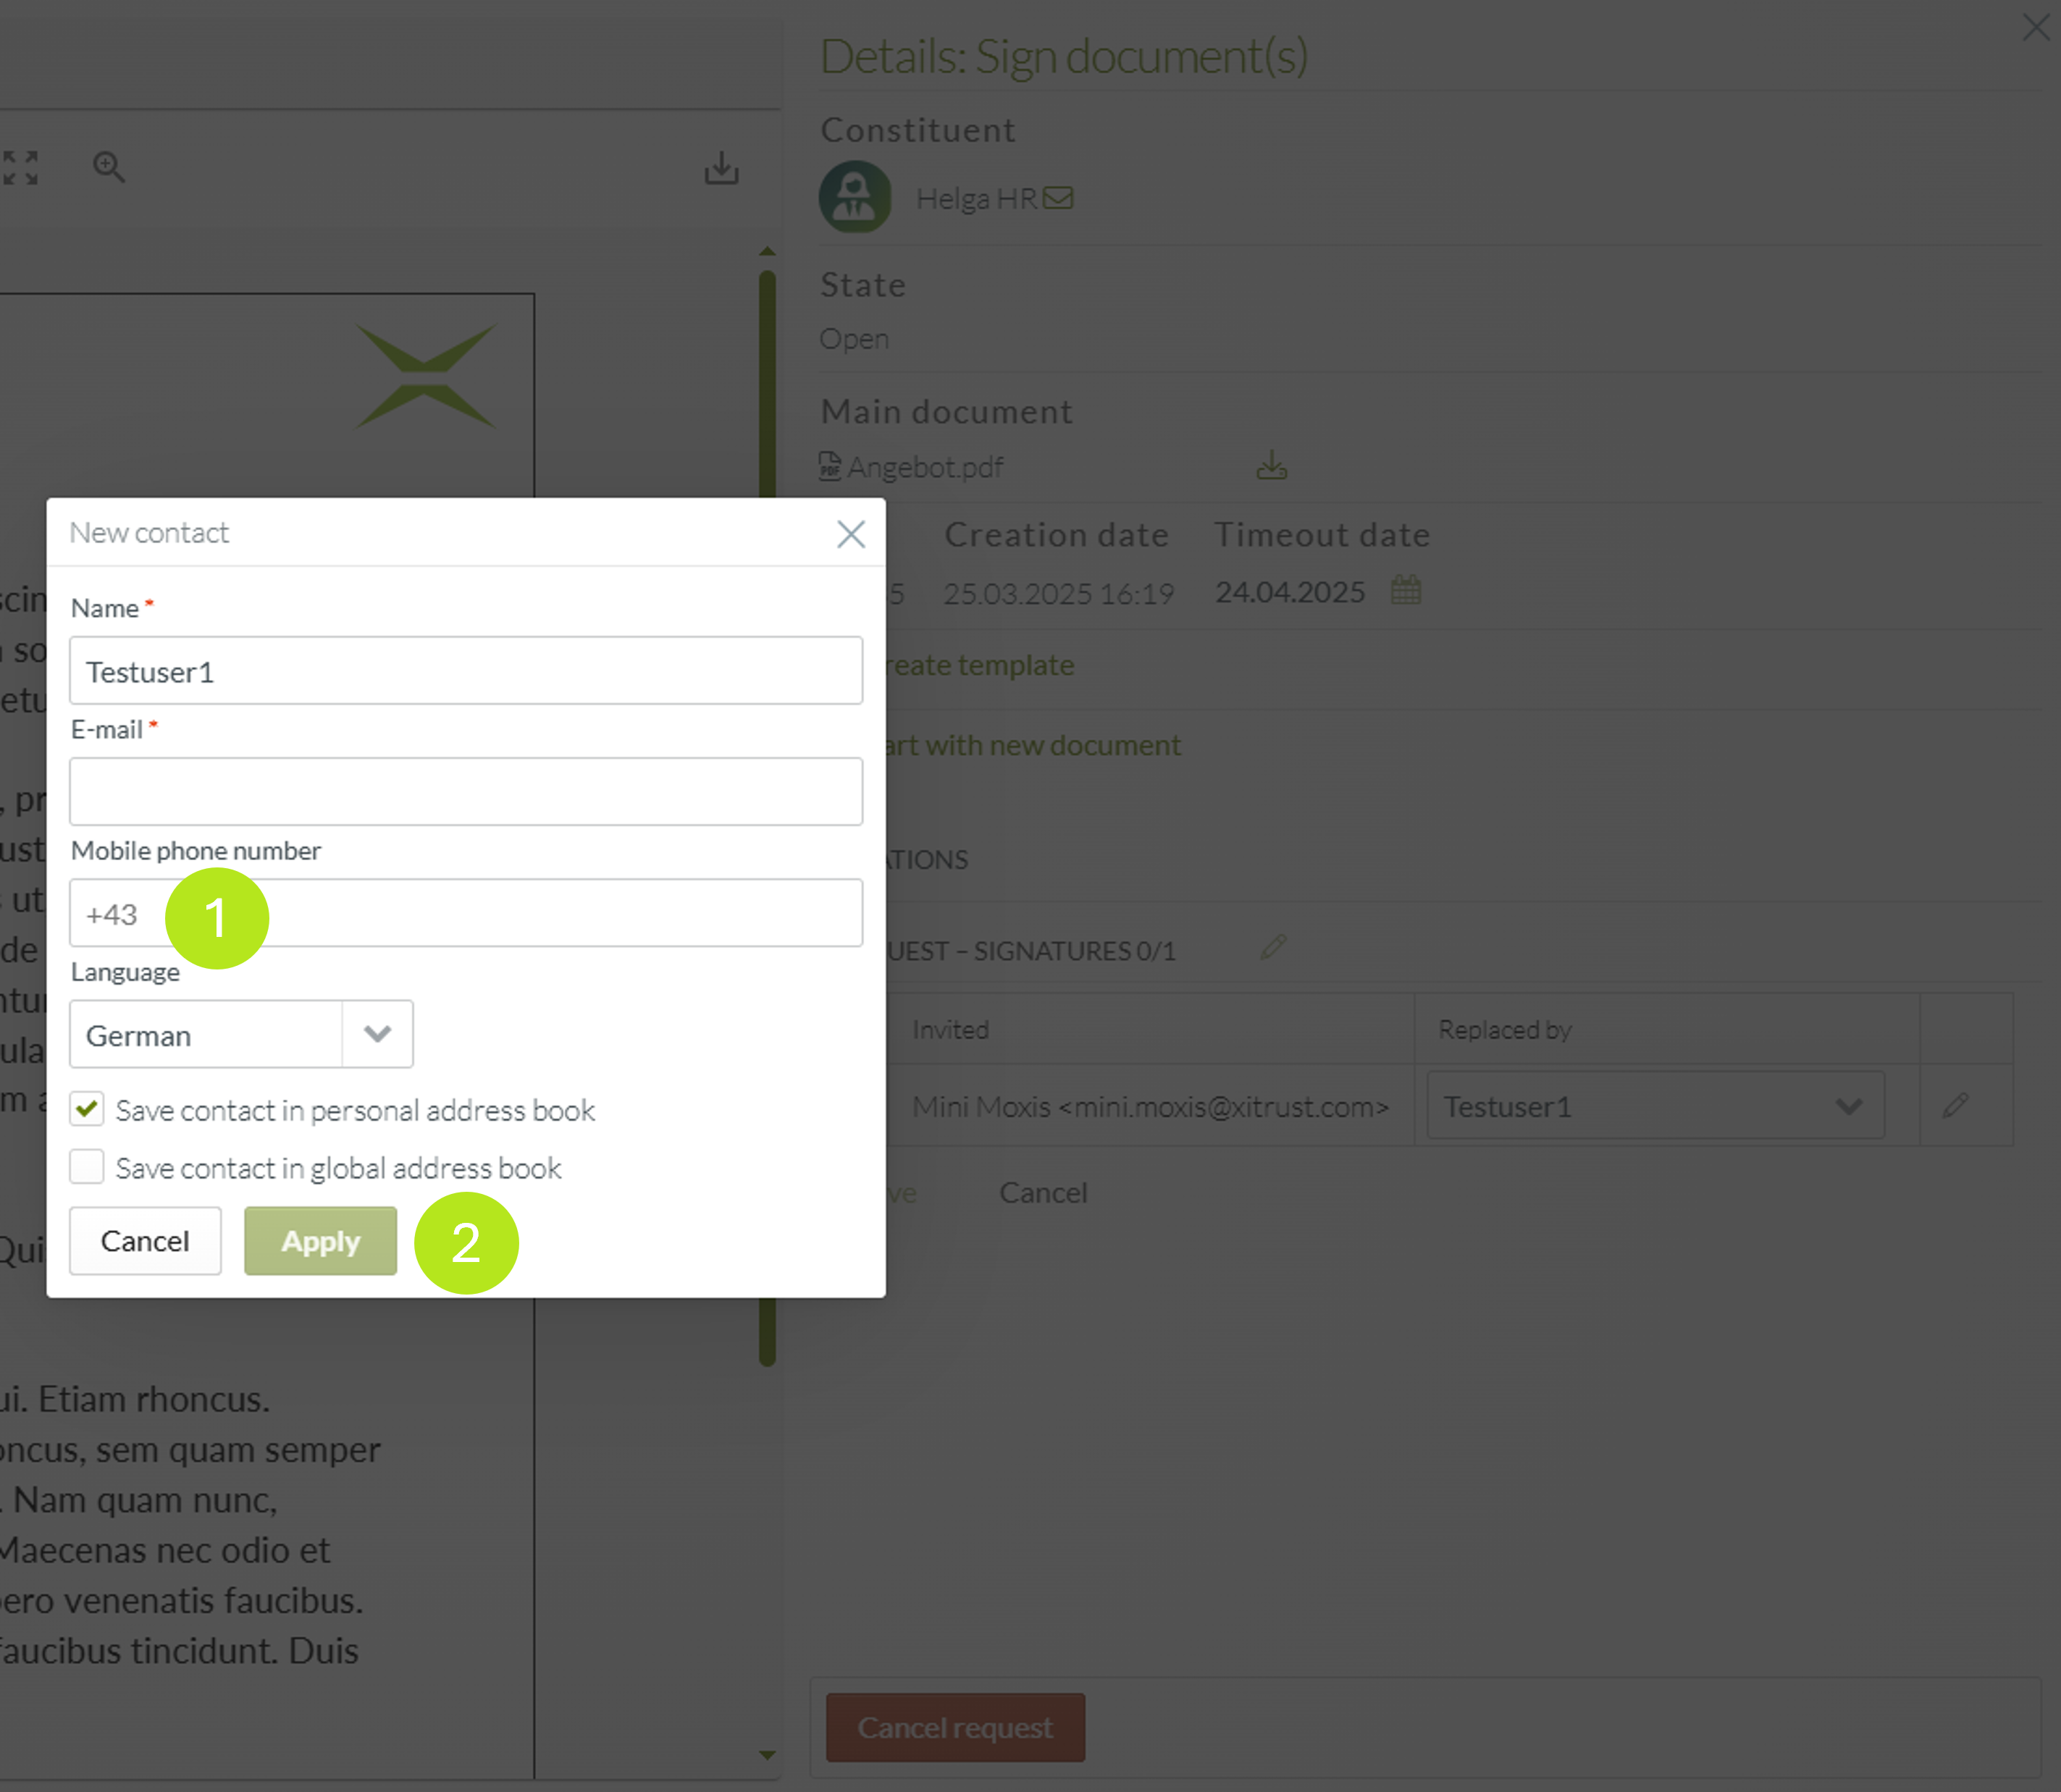
Step 3: An editing mask for the test user will now open. Please enter any mobile number here (see figure 3 [1]; e.g. +43699123456789) and other dummy data for the email address, and click on the [Apply]-button.
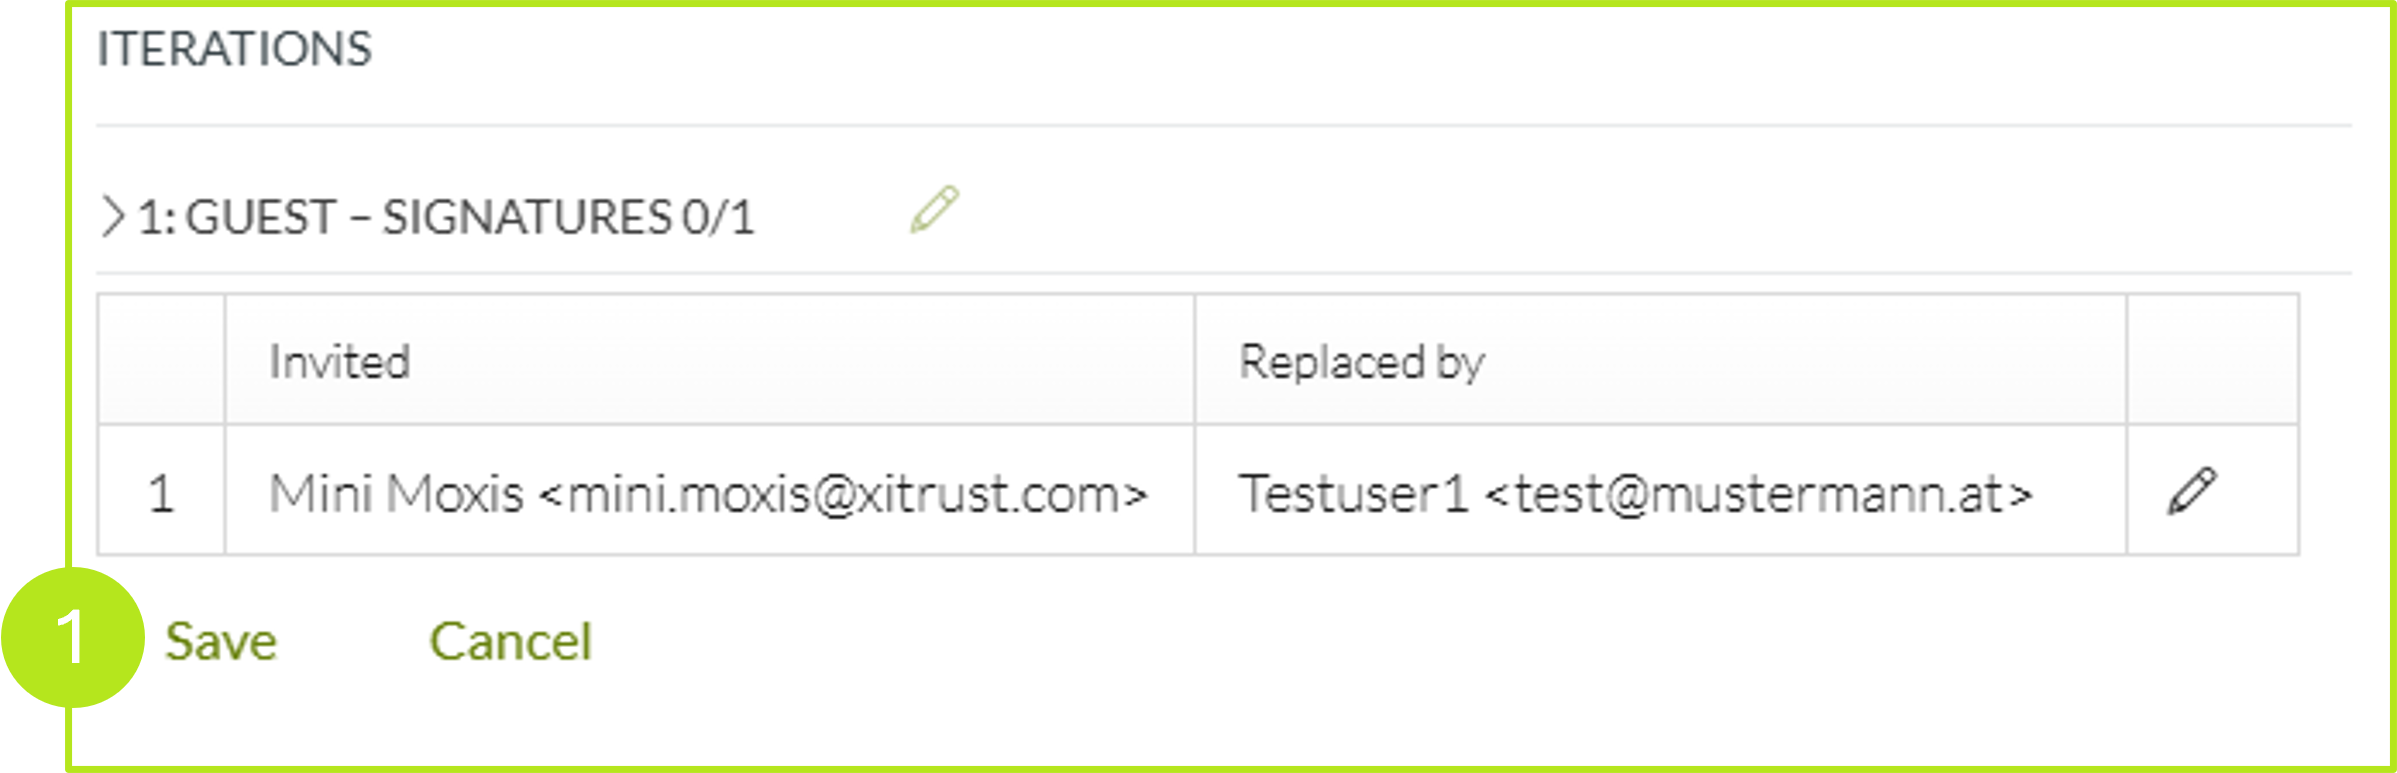
Step 4: After entering all test data, click Save in the detailed view (see figure 4 [1]).
Step 5: Please exchange the test user for the original contact again by following the steps 1 to 3. When you get to step 3, you have the option here (as with the test user before) to change the phone number of the original external signee (see figure 5 [1]). As soon as you have changed the data, please click on the [Apply]-button again.
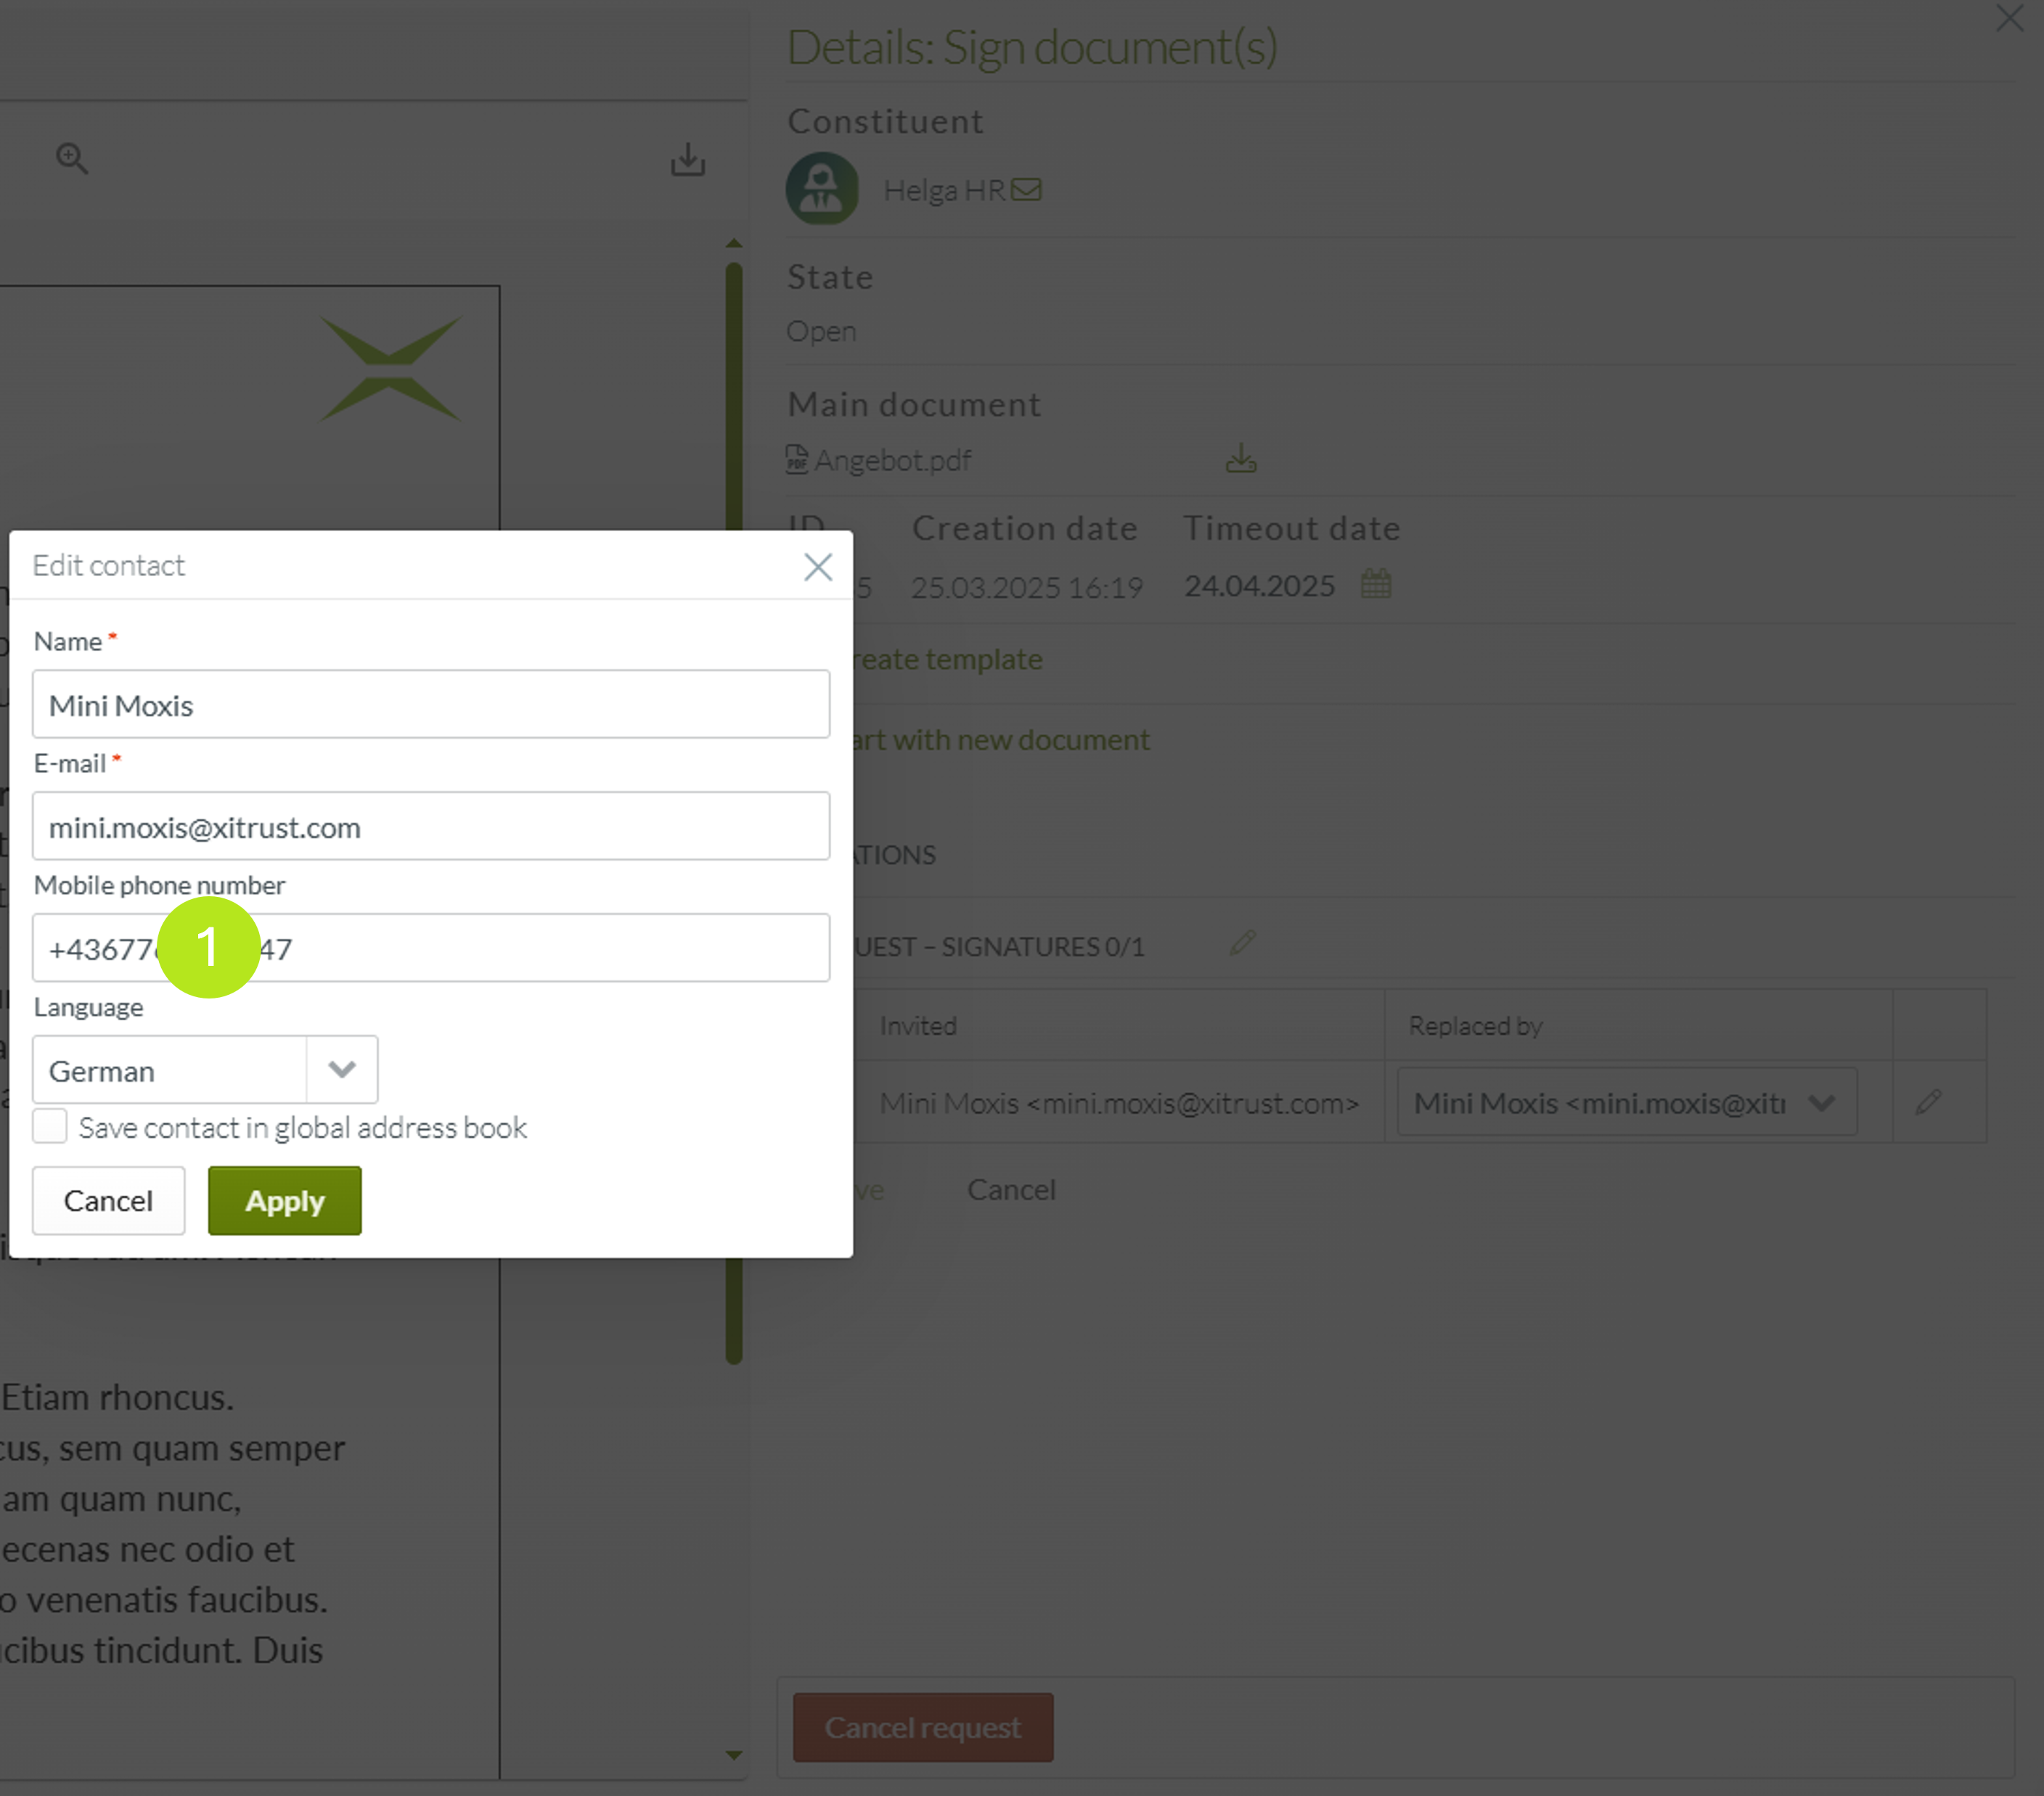
Step 6: Save the renewed change as described in step 4. After saving, a new invitation email is generated for the external signer. Using this new link, the job can be signed again via MOXIS Guest. However, the TAN is sent to the correct number now.